


WDM Construction of SWFL, LLC
NARI Member 12573426
Licensed
Florida State Certified
Building Contractor CBC1256274
WDM Construction of SWFL, LLC
NARI Member 12573426
Licensed
Florida State Certified
Building Contractor CBC1256274
This is a beautiful, waterfront property which was originally built in 1999 in the gated Cape Harbour community in Southwest Cape Coral. The house had seen some damage during Hurricane Charlie in 2004, was remodeled extensively in 2005/2006 and sold in 2007. In 2012, the Hoversens purchased the property as a vacation home so they could escape Minnesota winters.
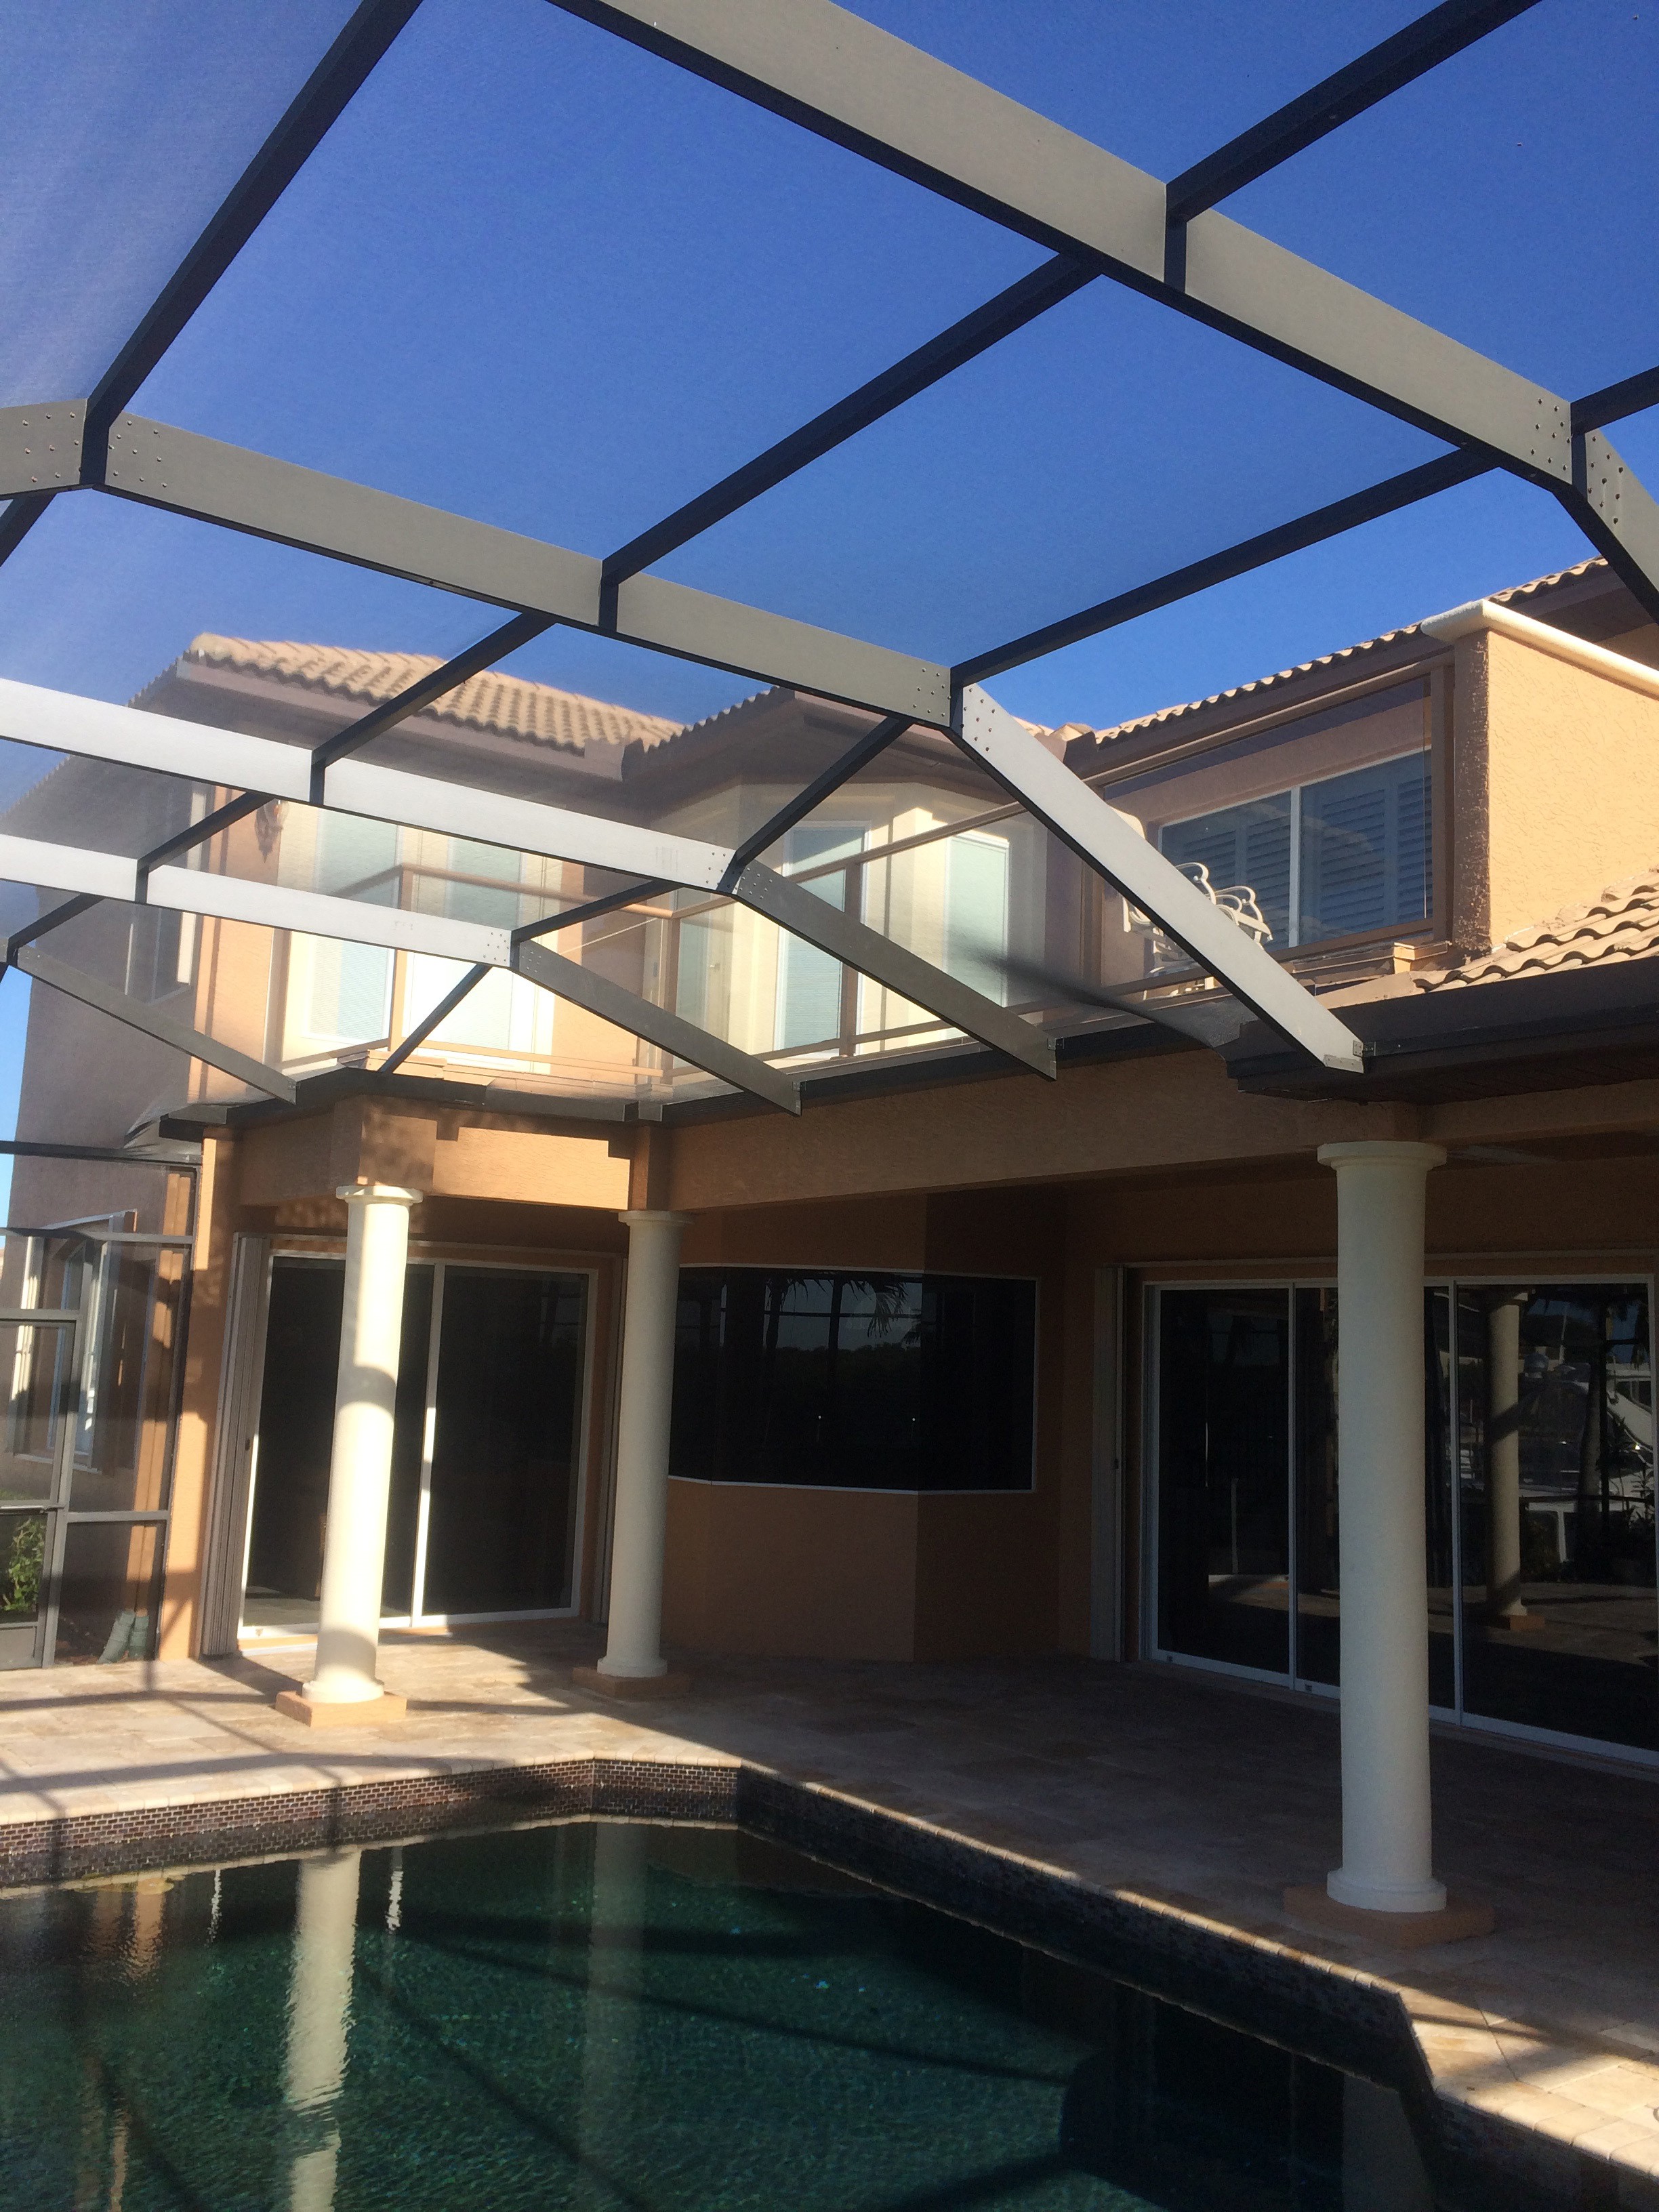
Ray and Patty contacted me in 2013 to redo tile on their second floor rear balcony overlooking the waterway and the preserve behind their home. They also requested to have the railing replaced and some stucco issues corrected. During the contracted work we discovered issues with faulty/improperly installed doors that had allowed water to damage some plywood. The joist system below the floor tile was free of any signs of water or insect damage. We completed the balcony tile and installed custom powder coated aluminum and glass railings. Our clients were thrilled with their new balcony.
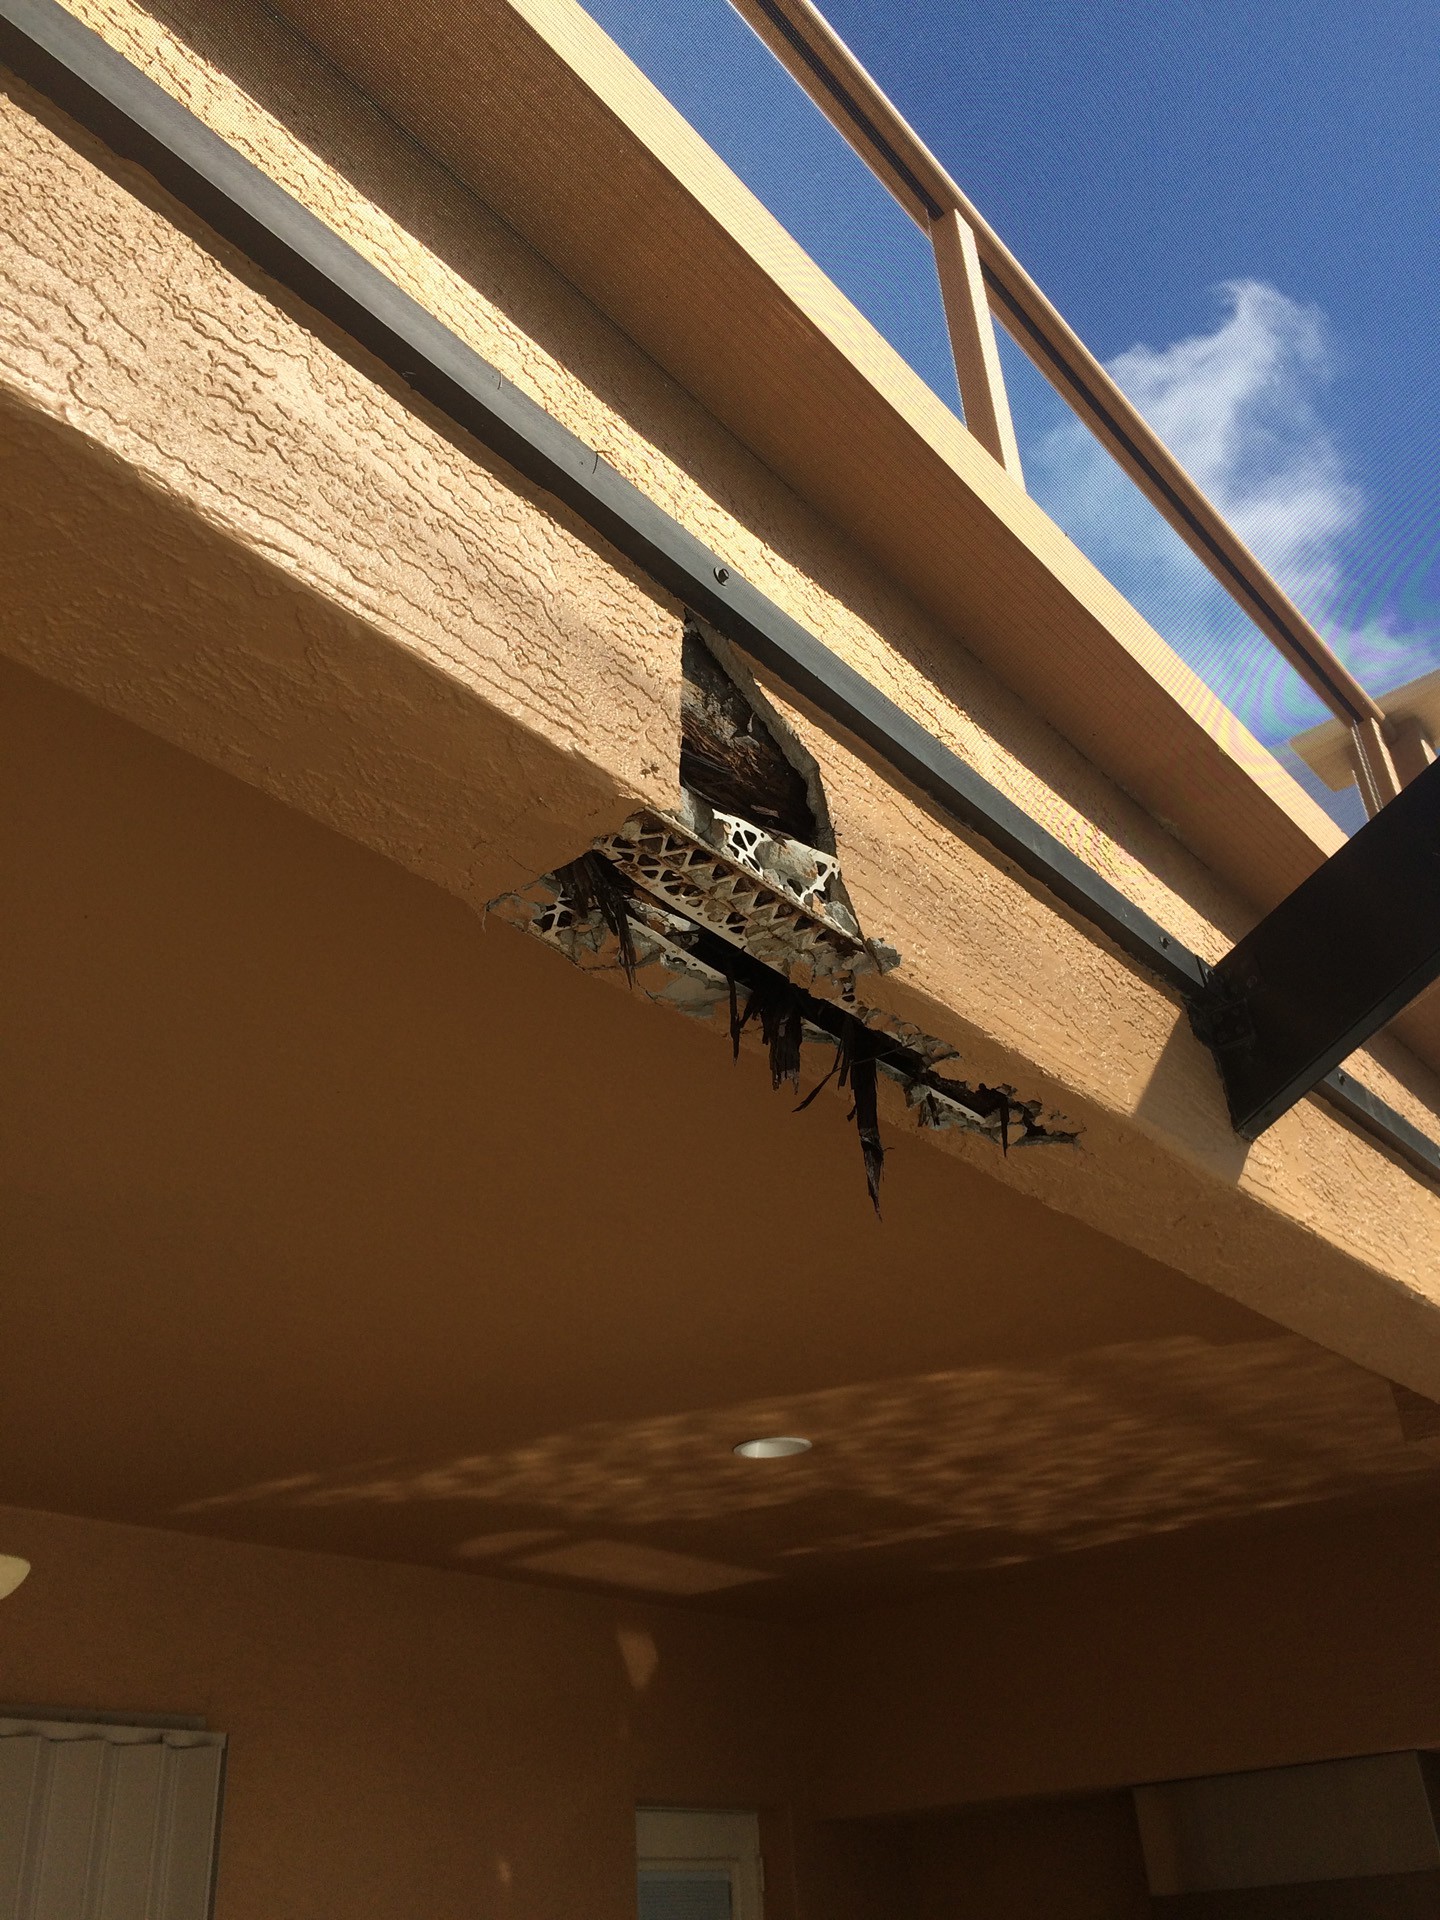
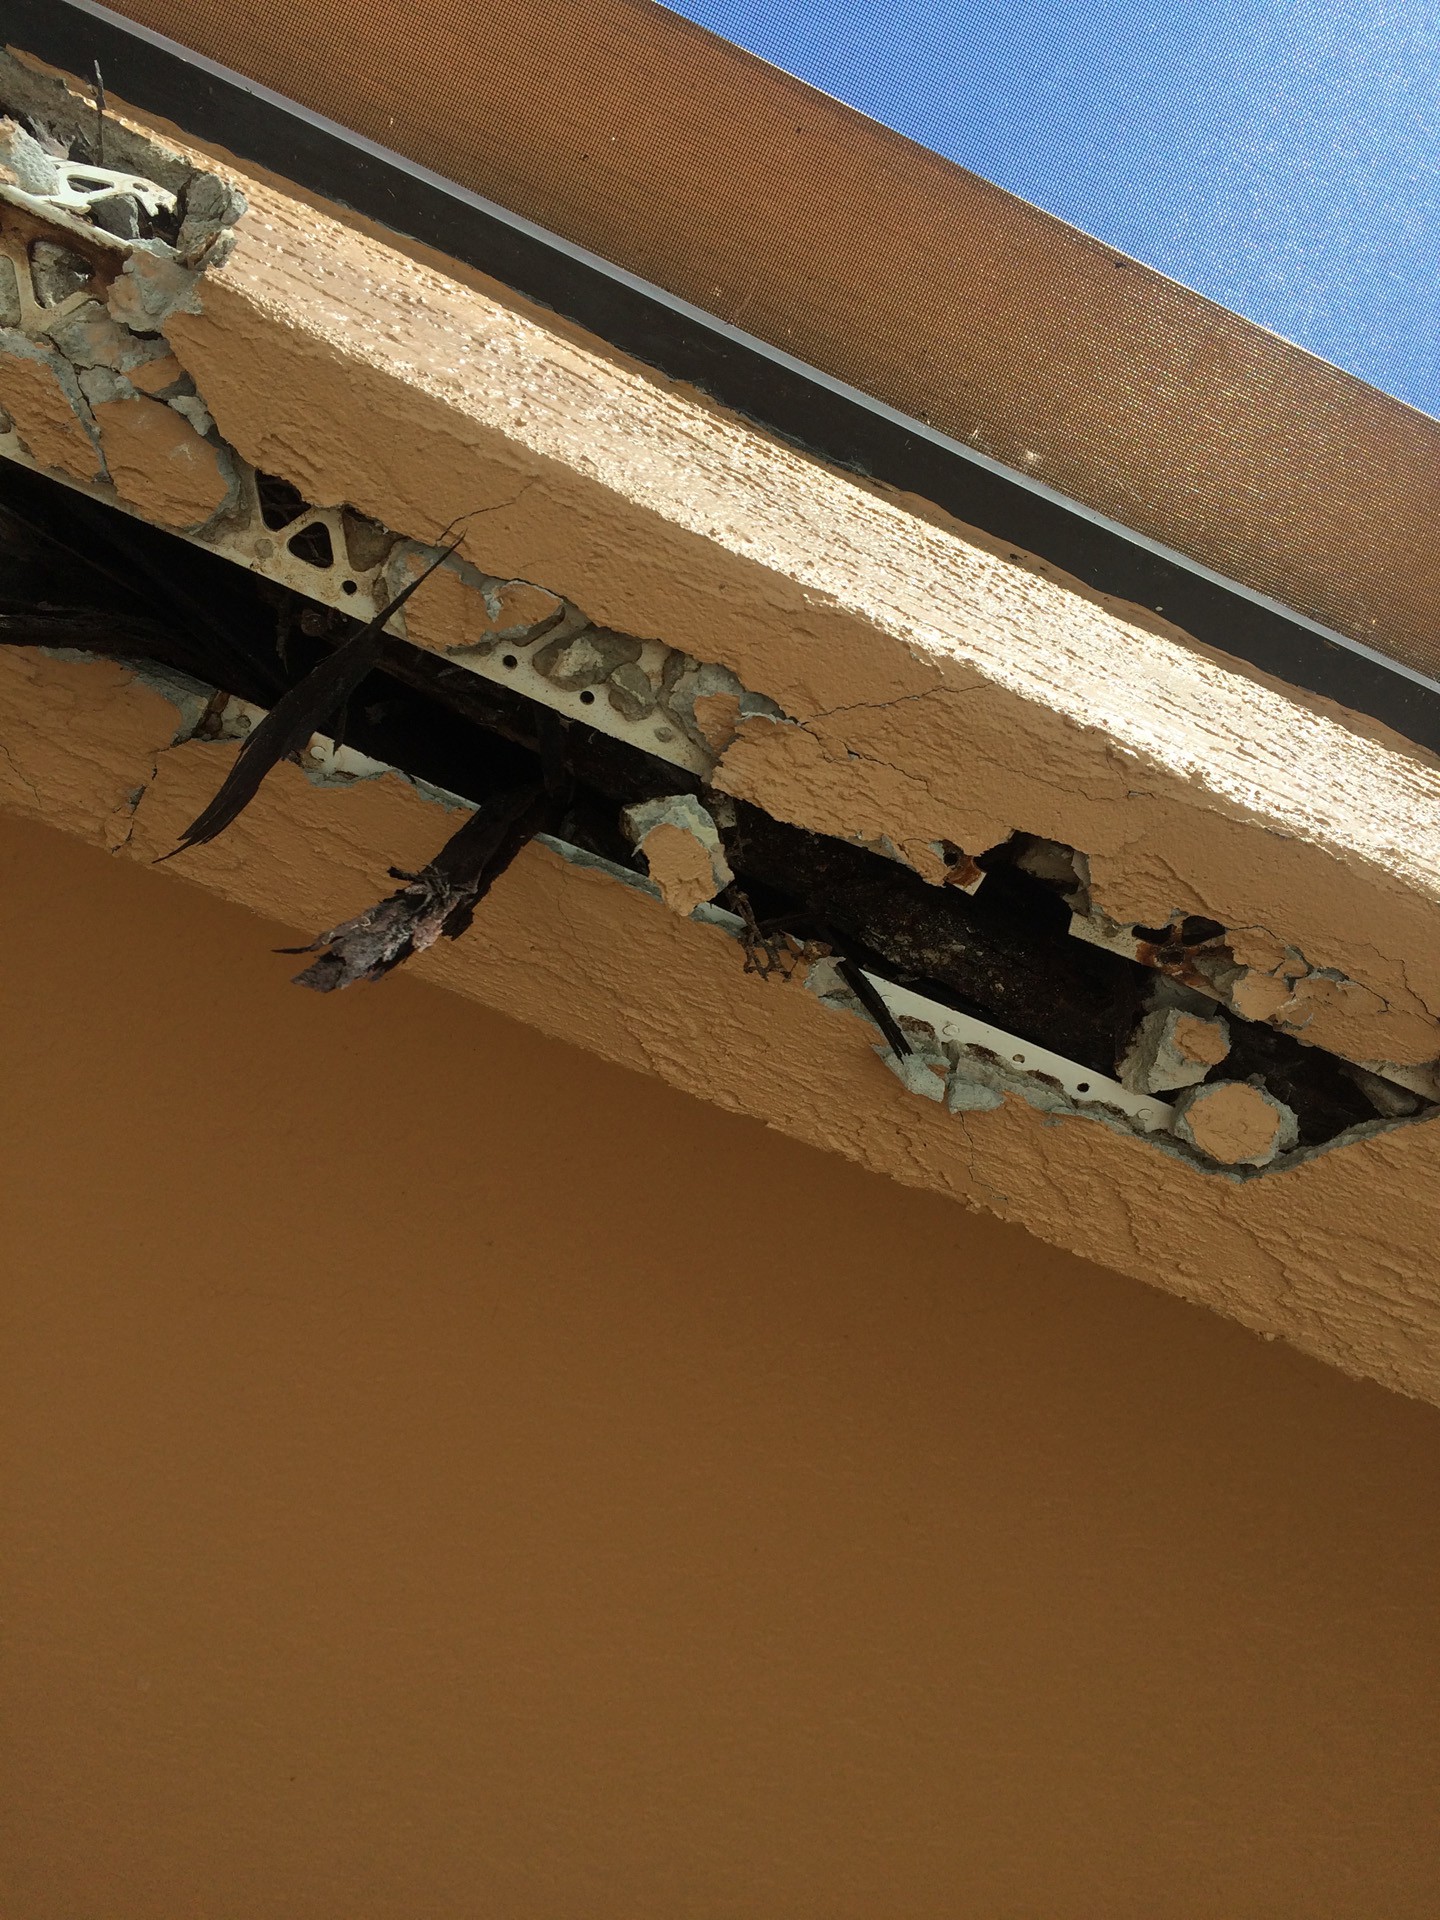
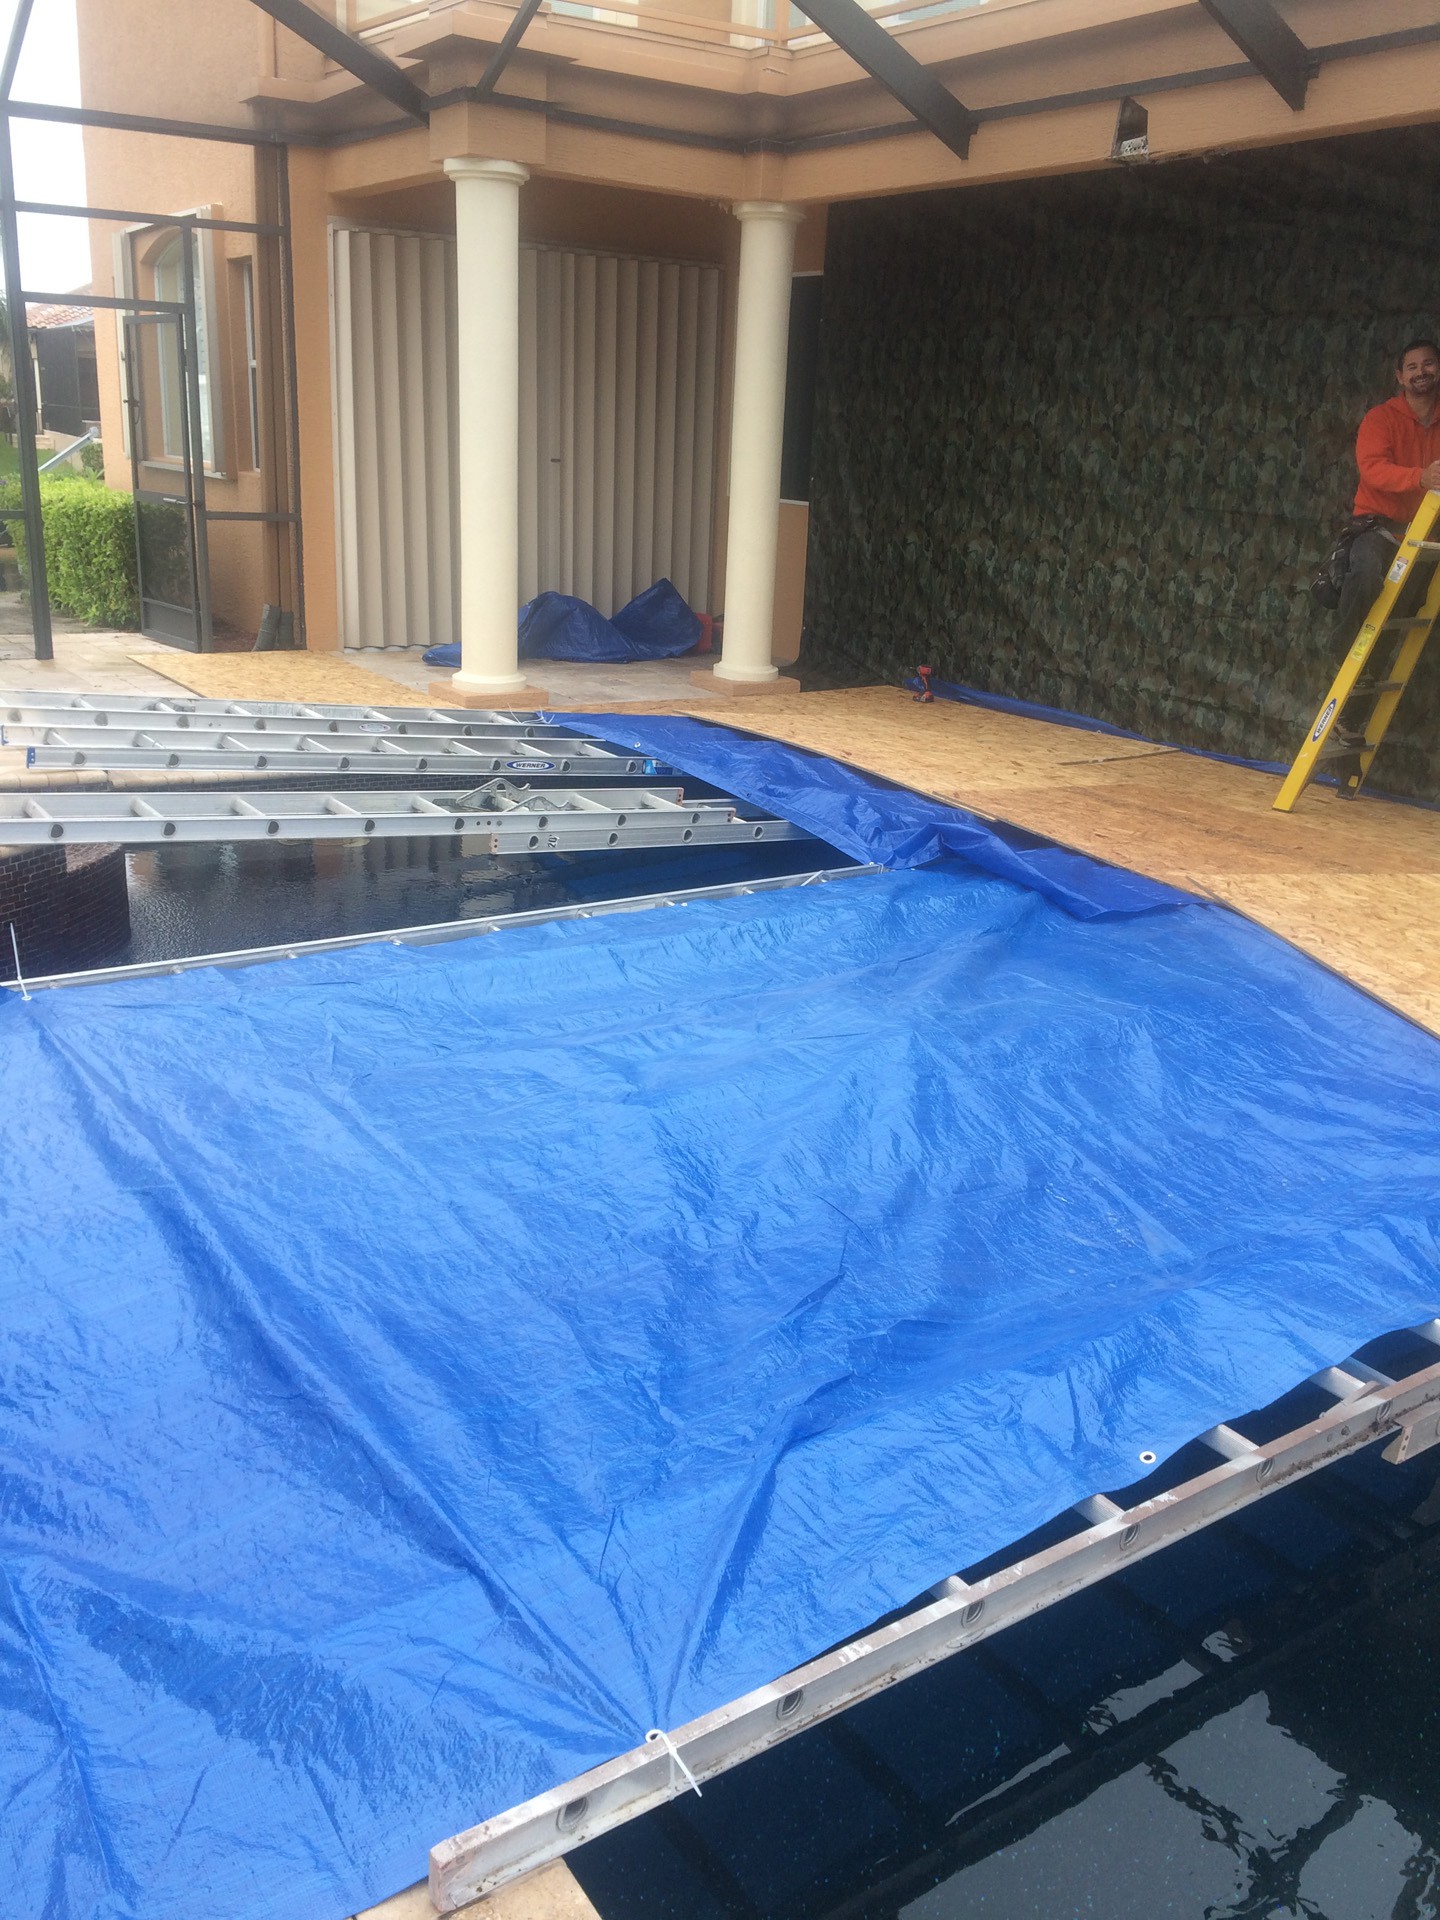
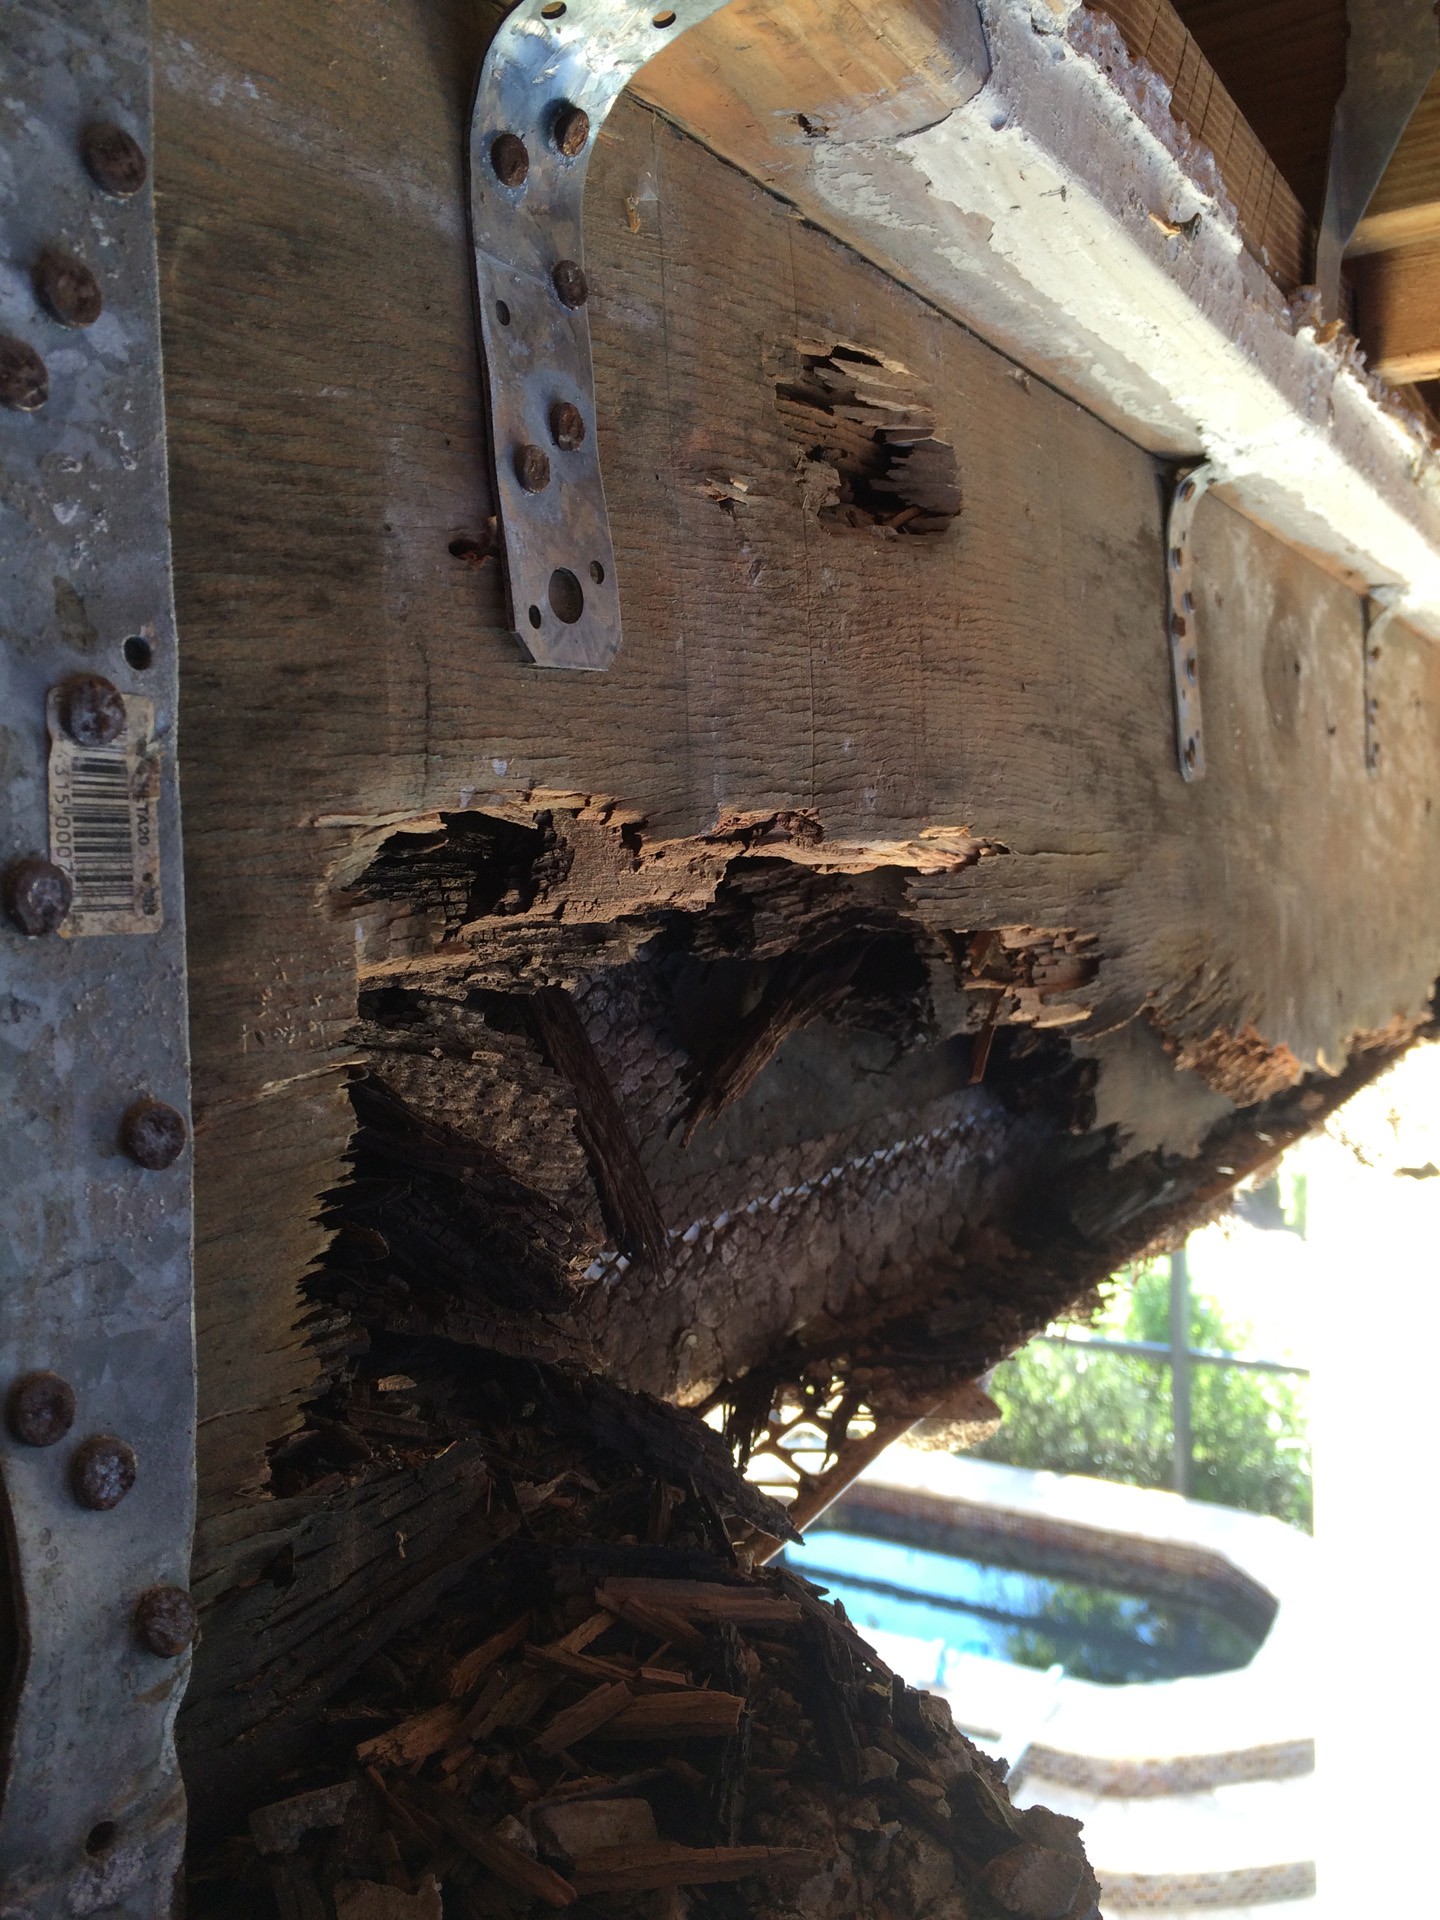
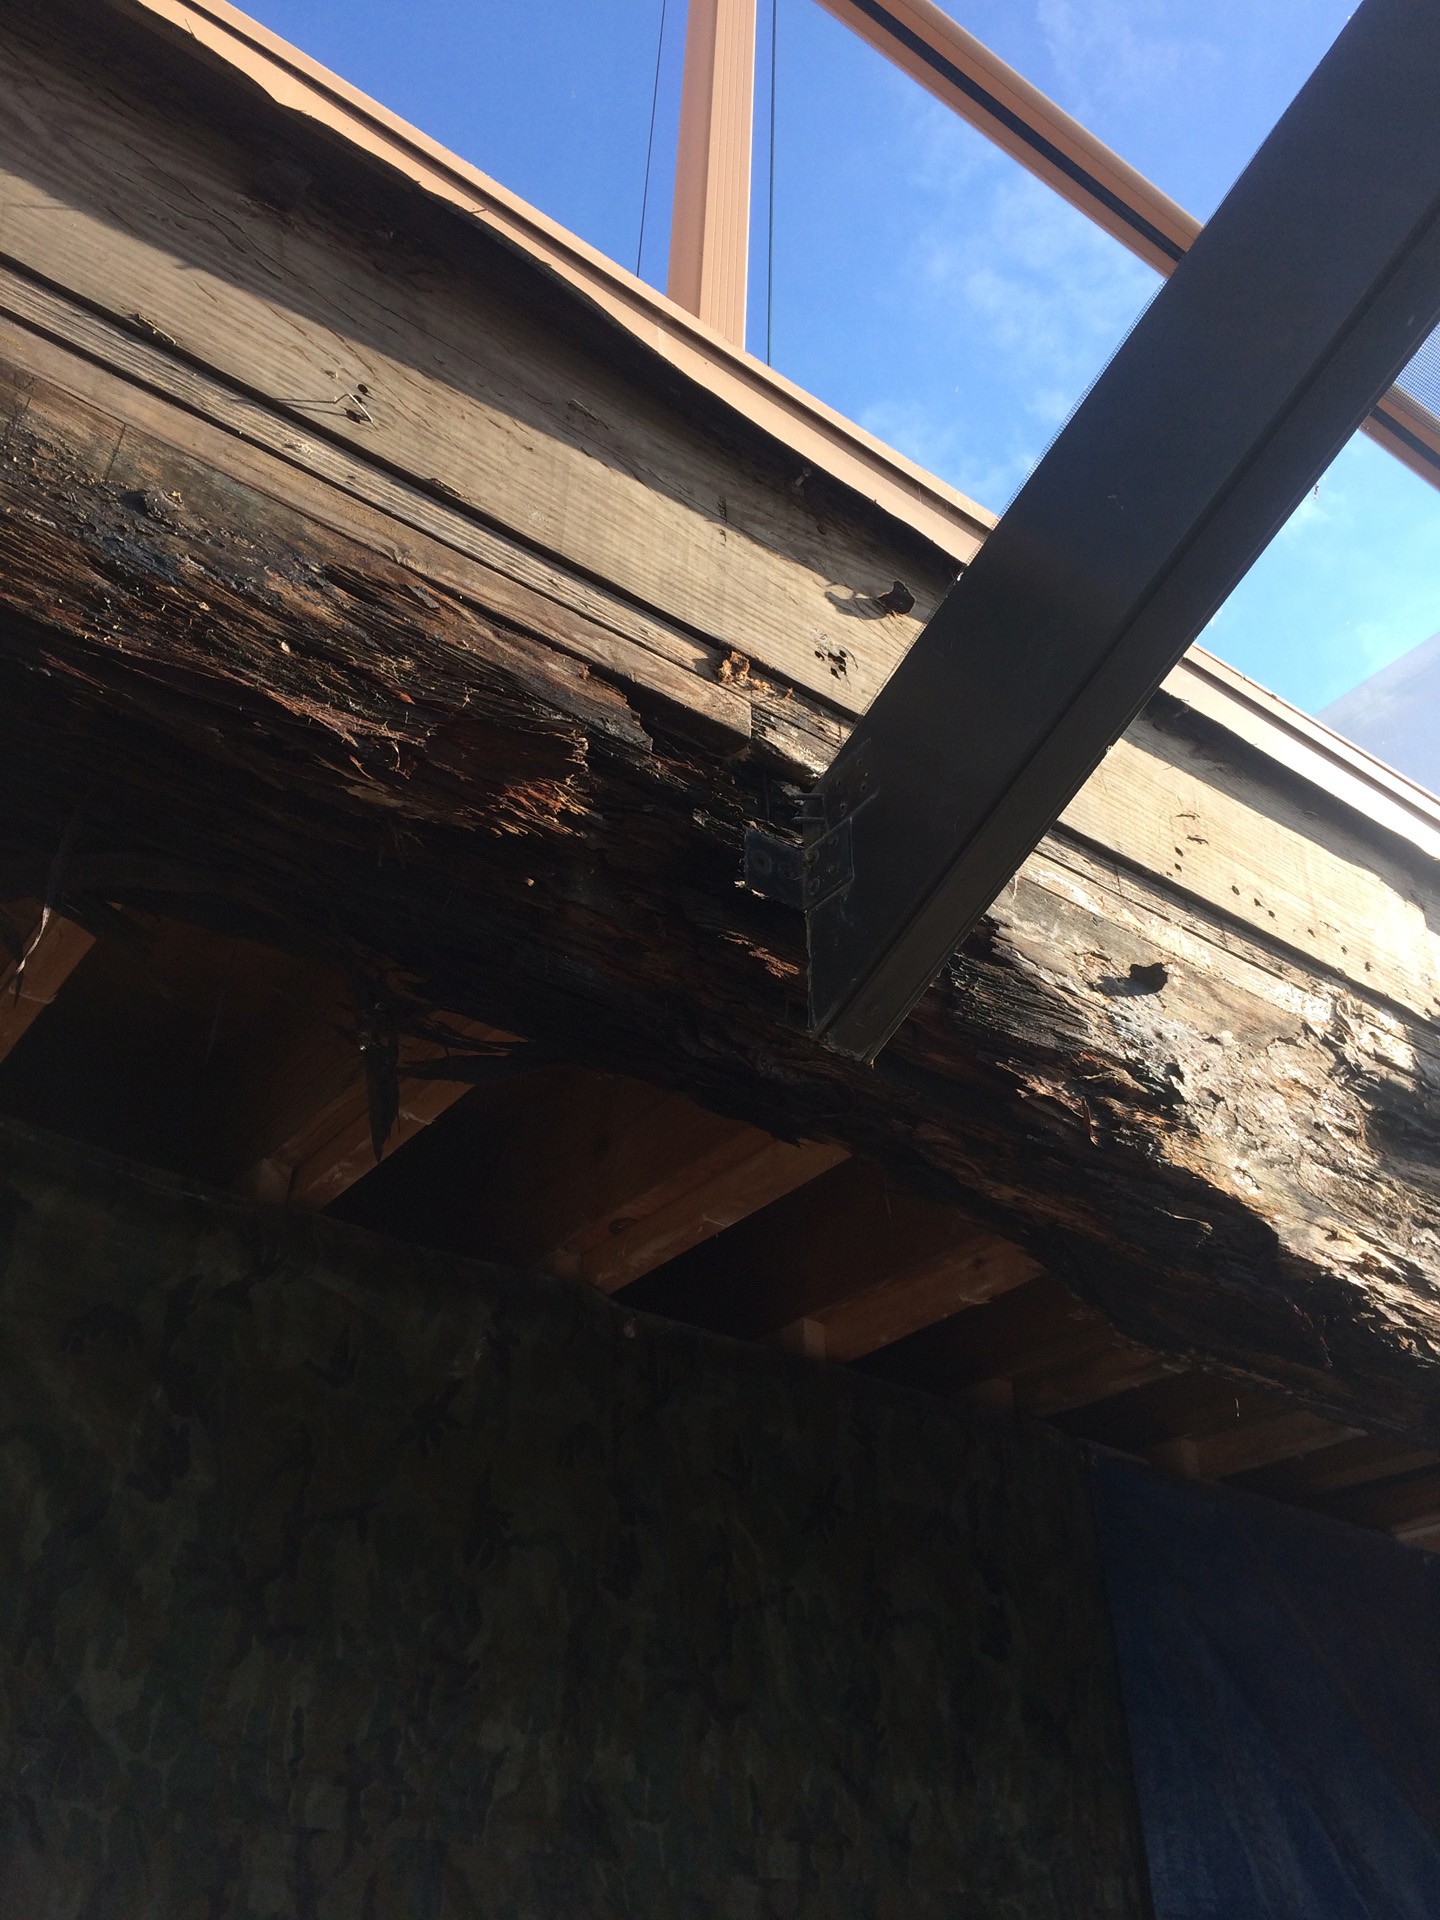
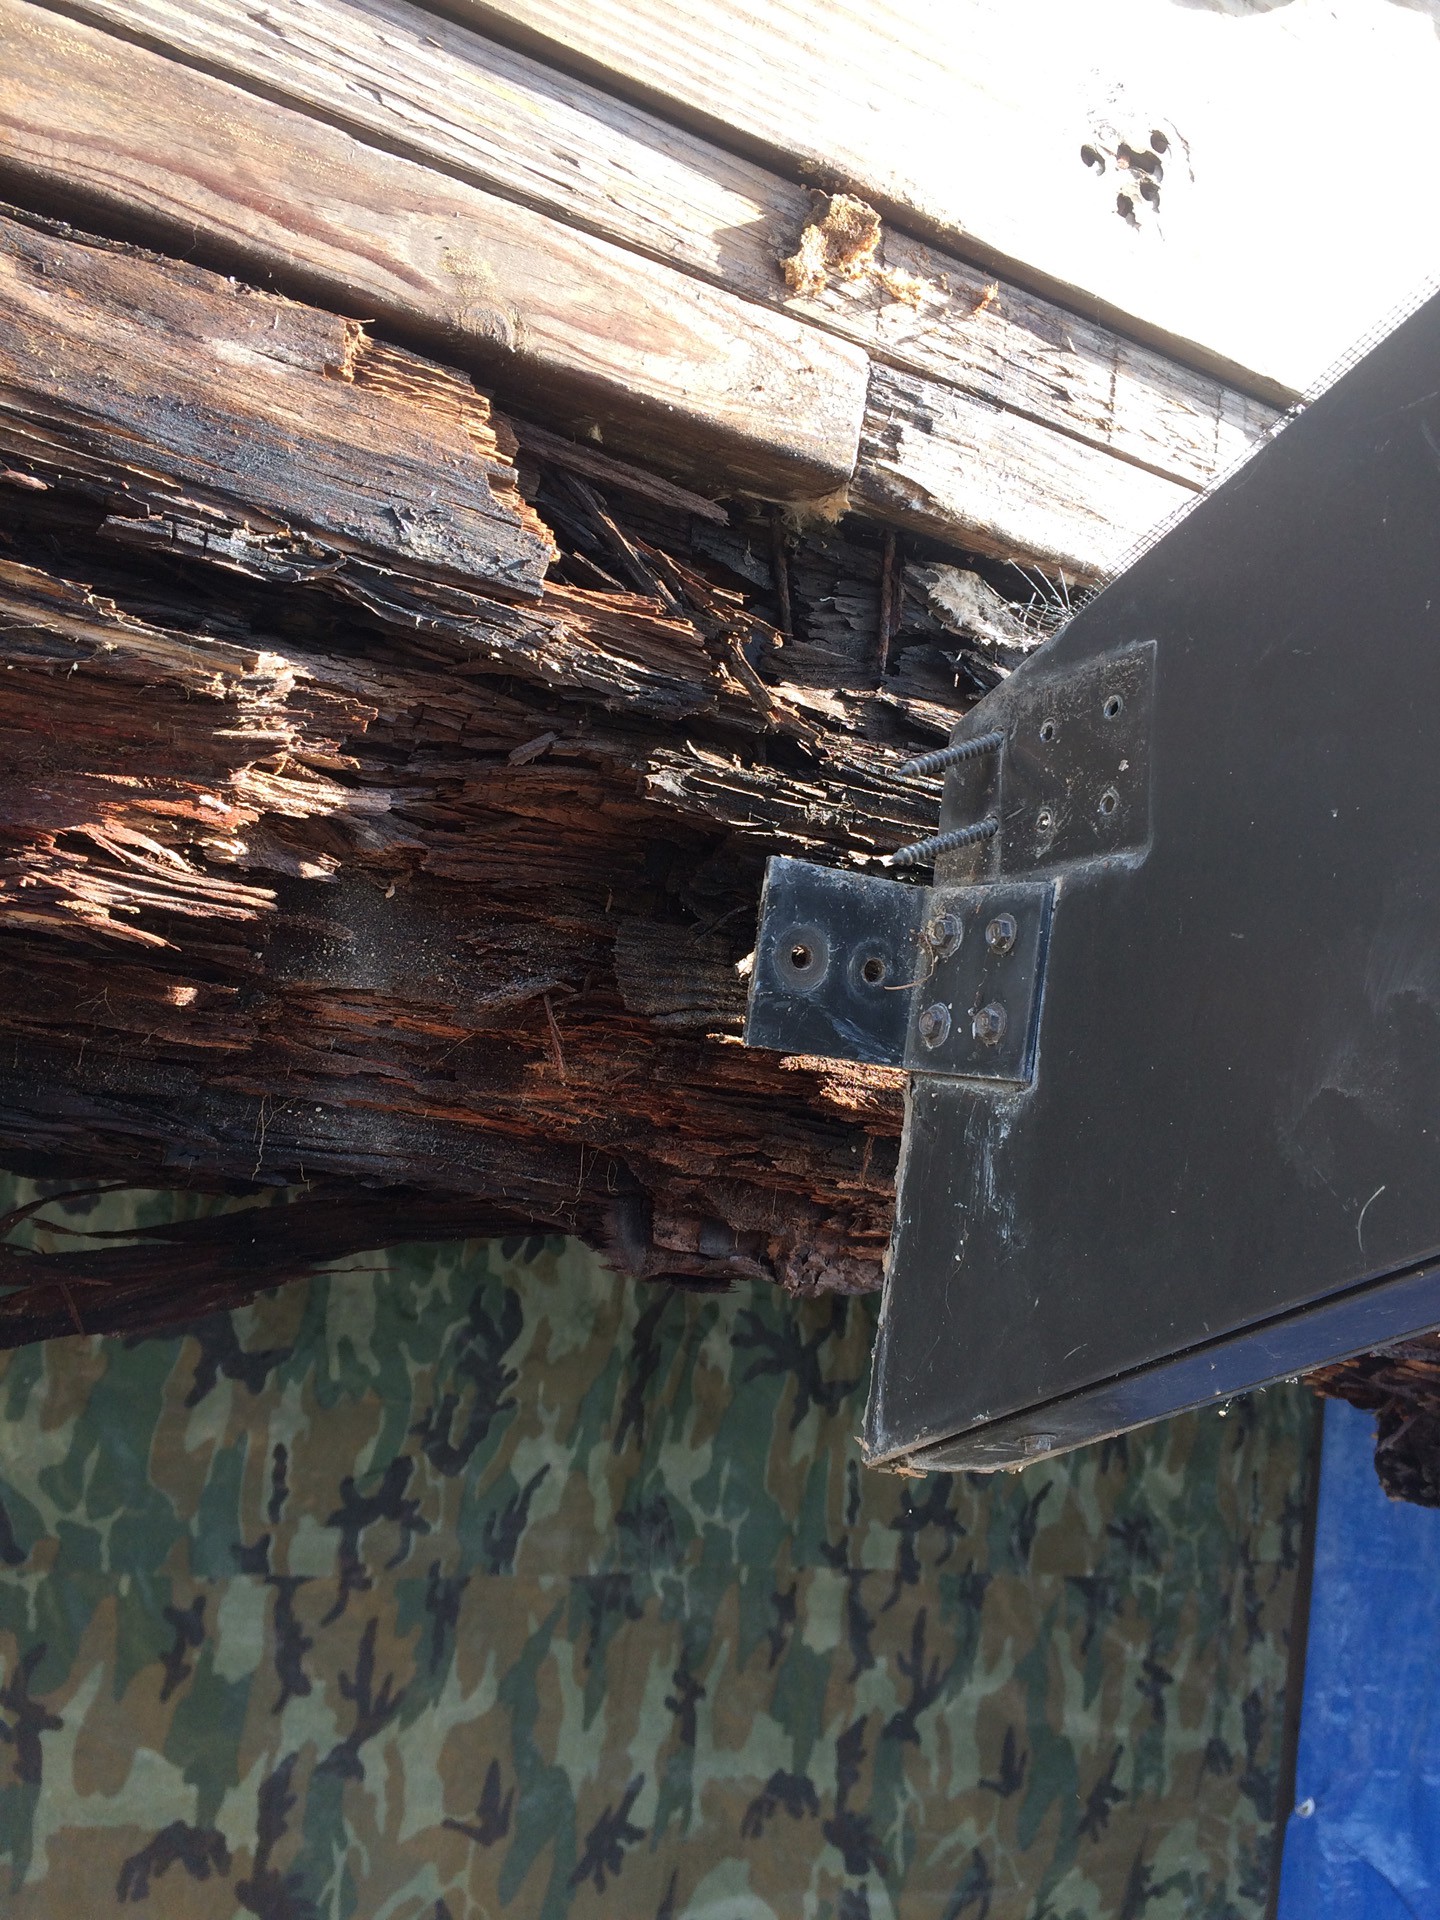
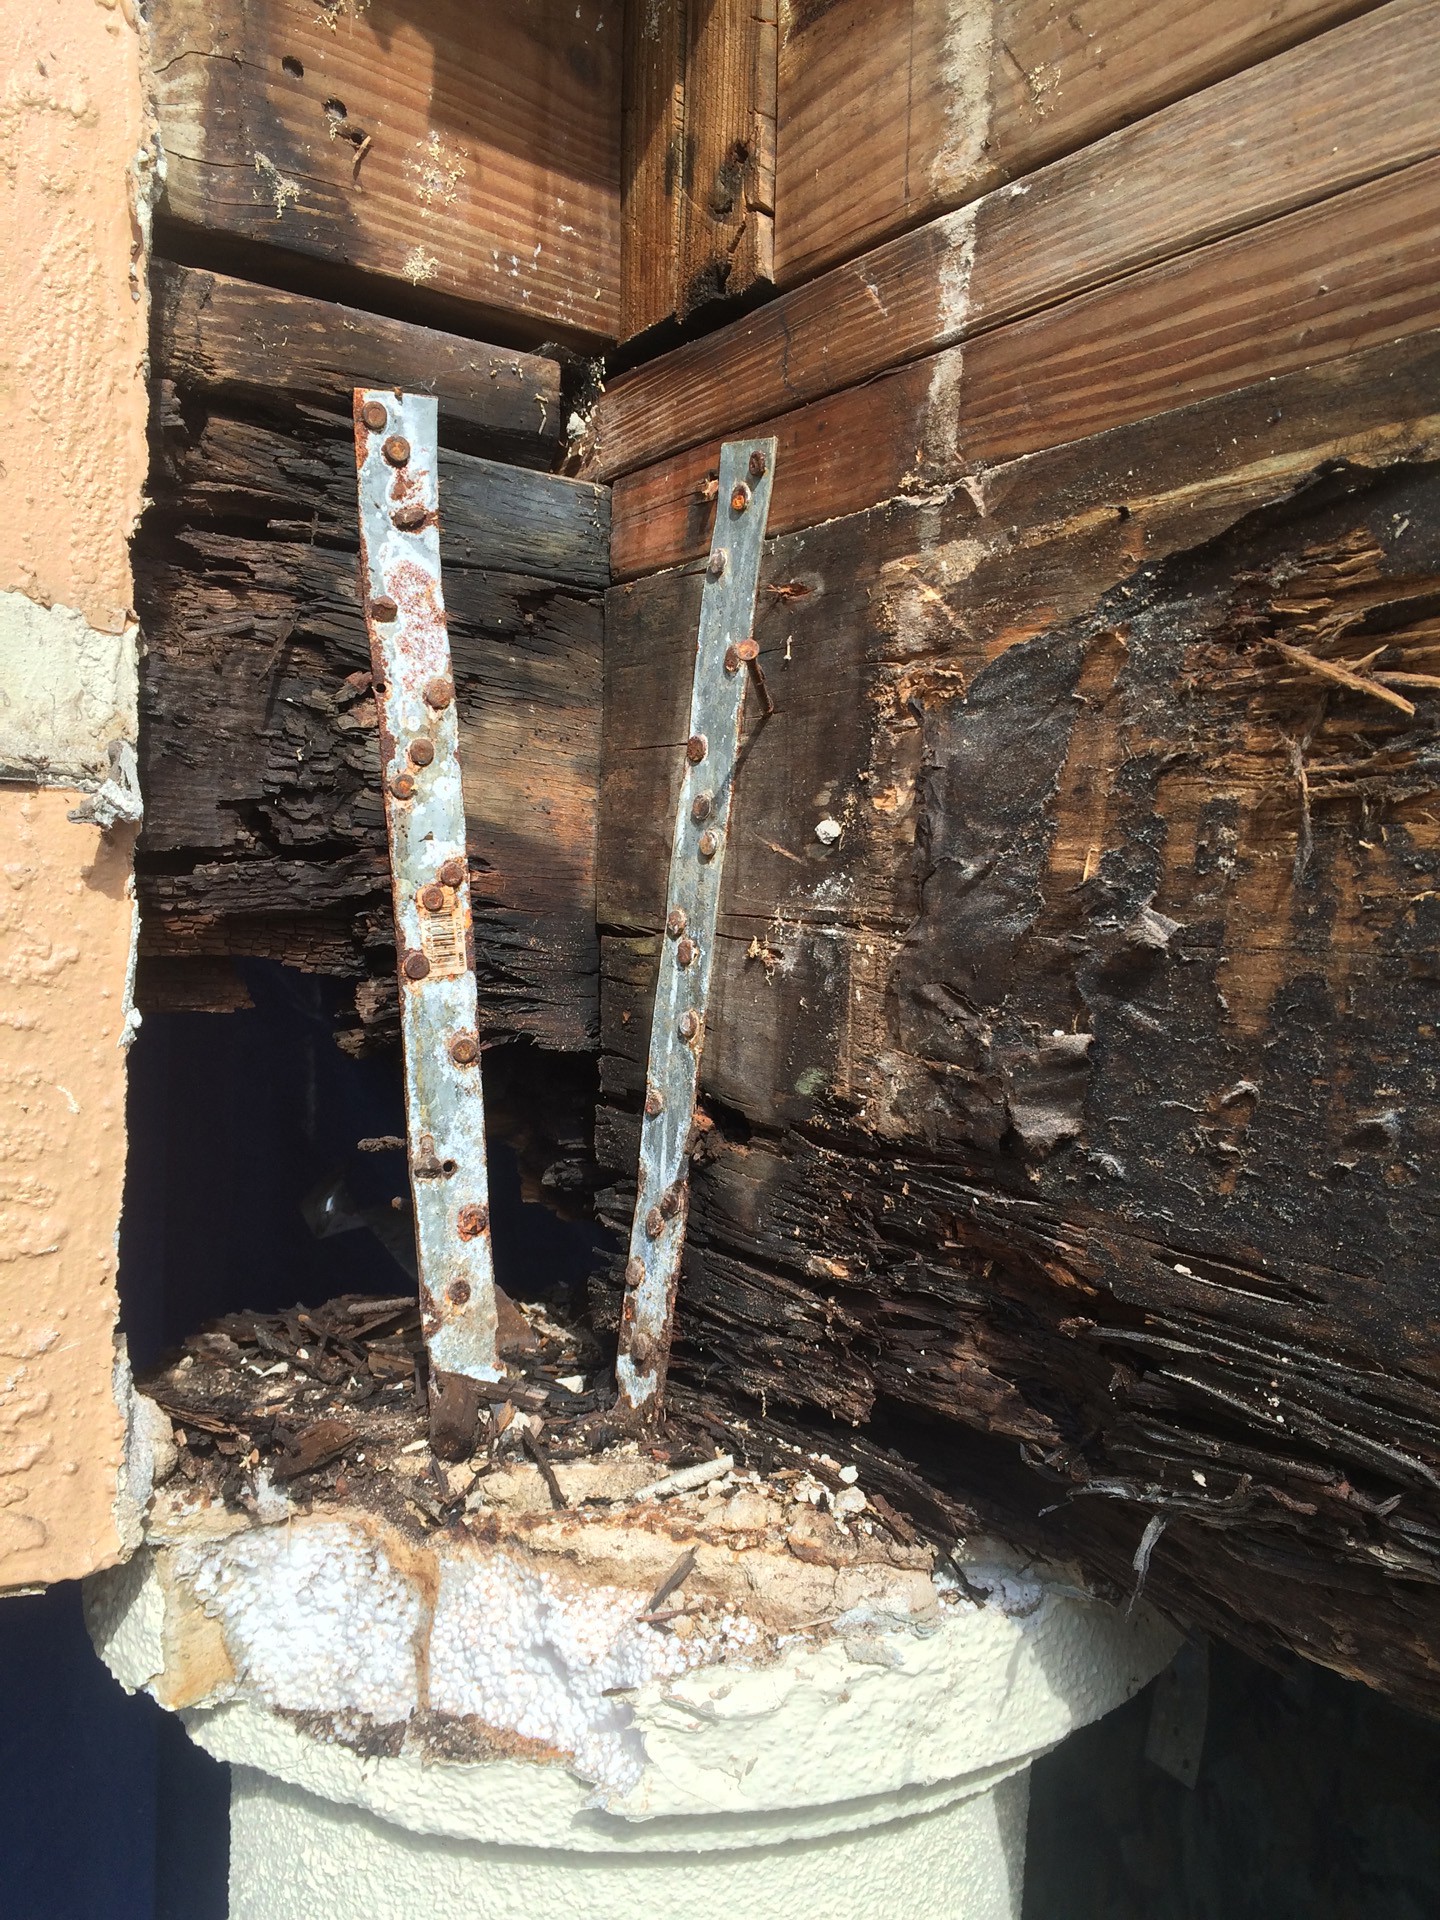
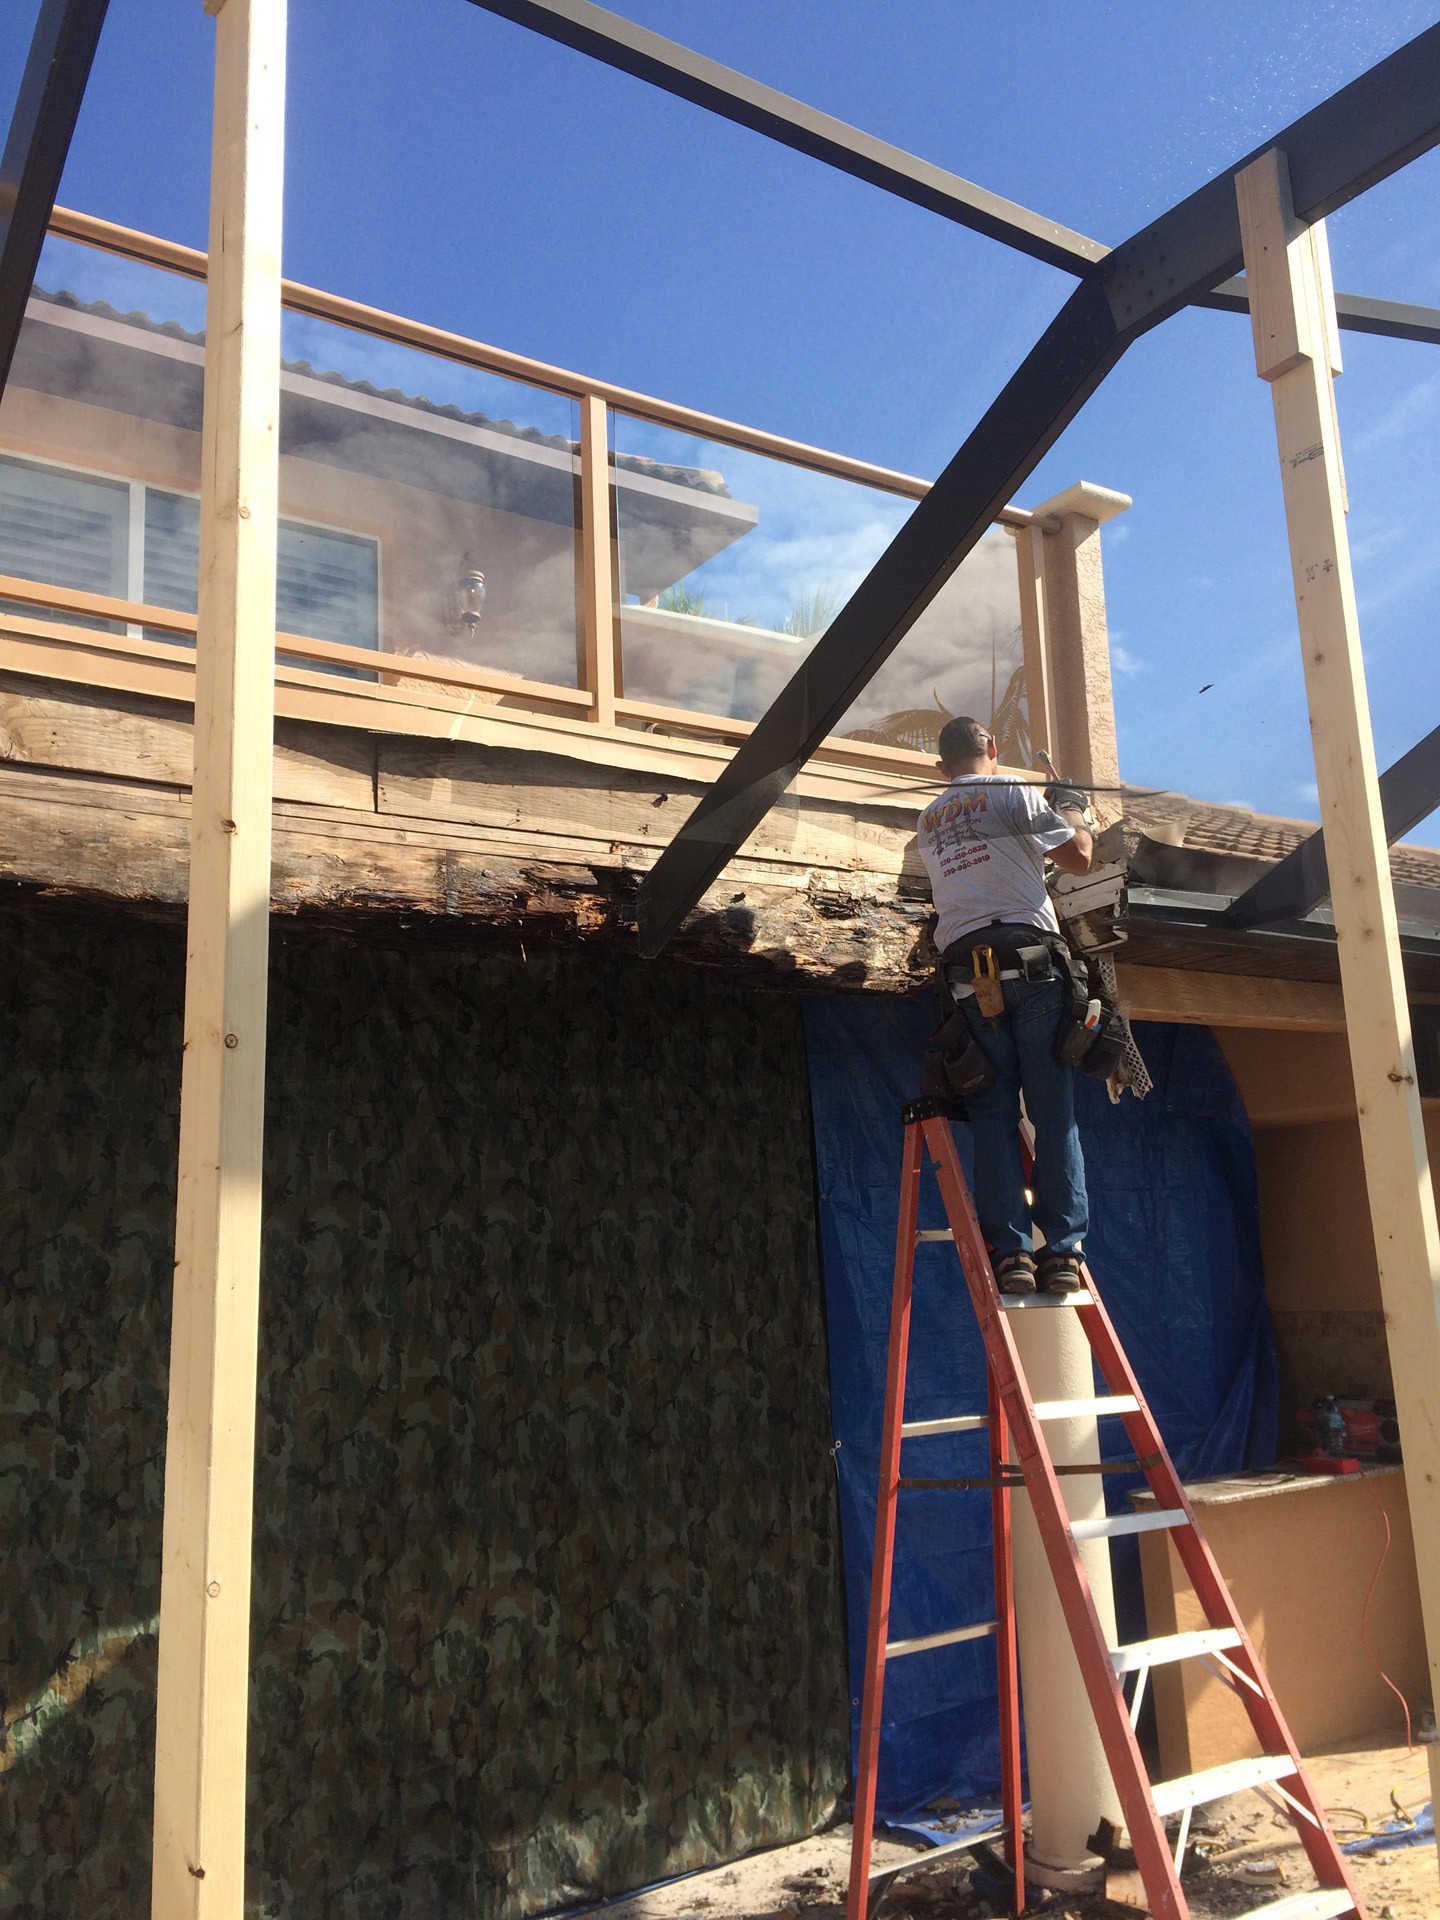
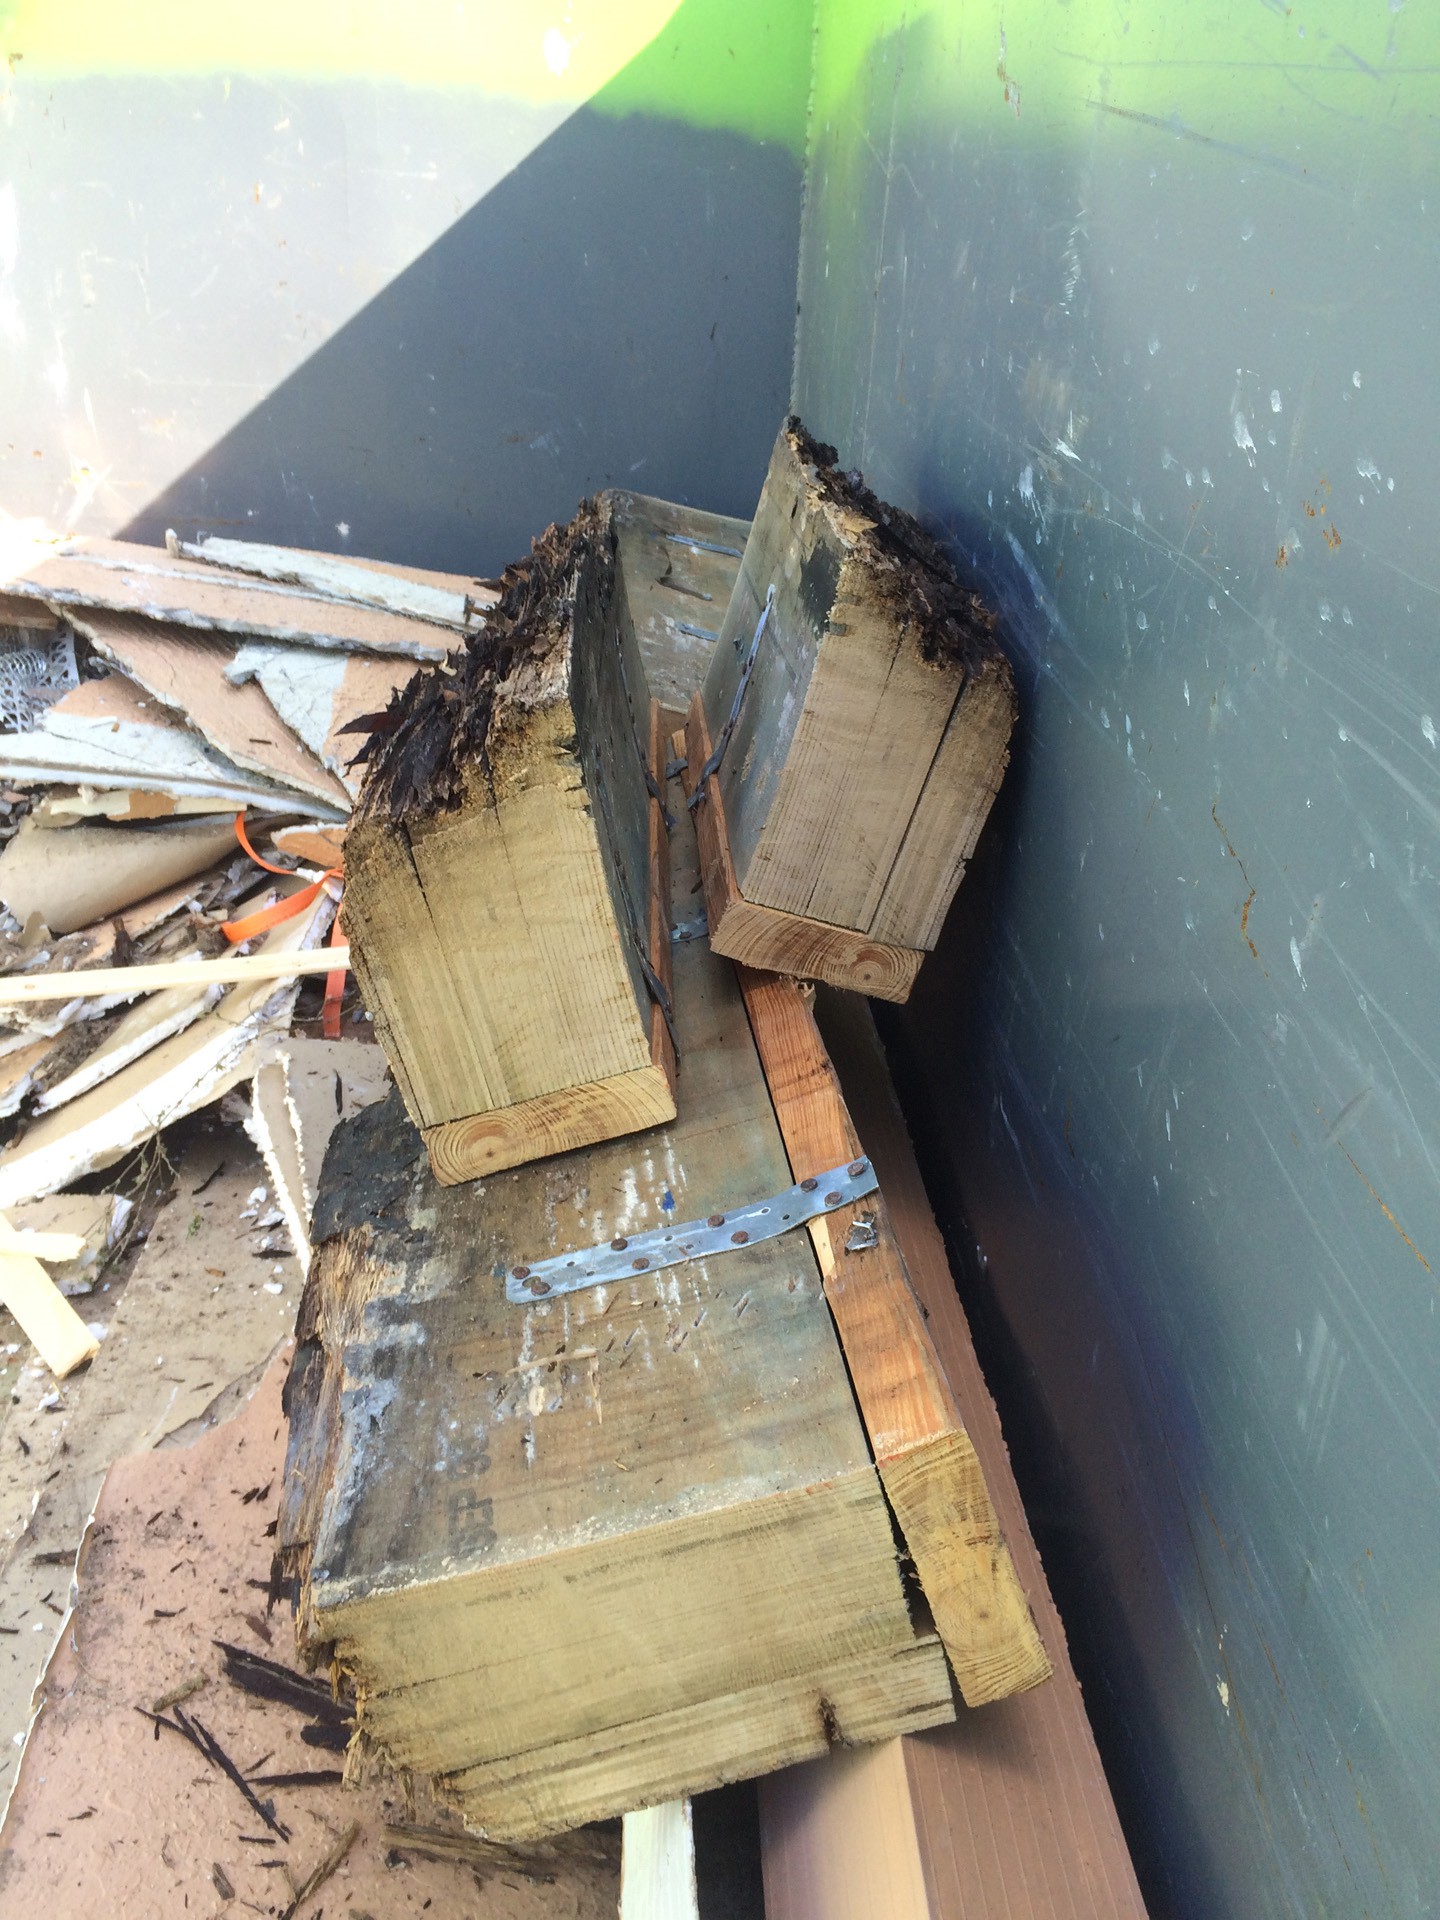
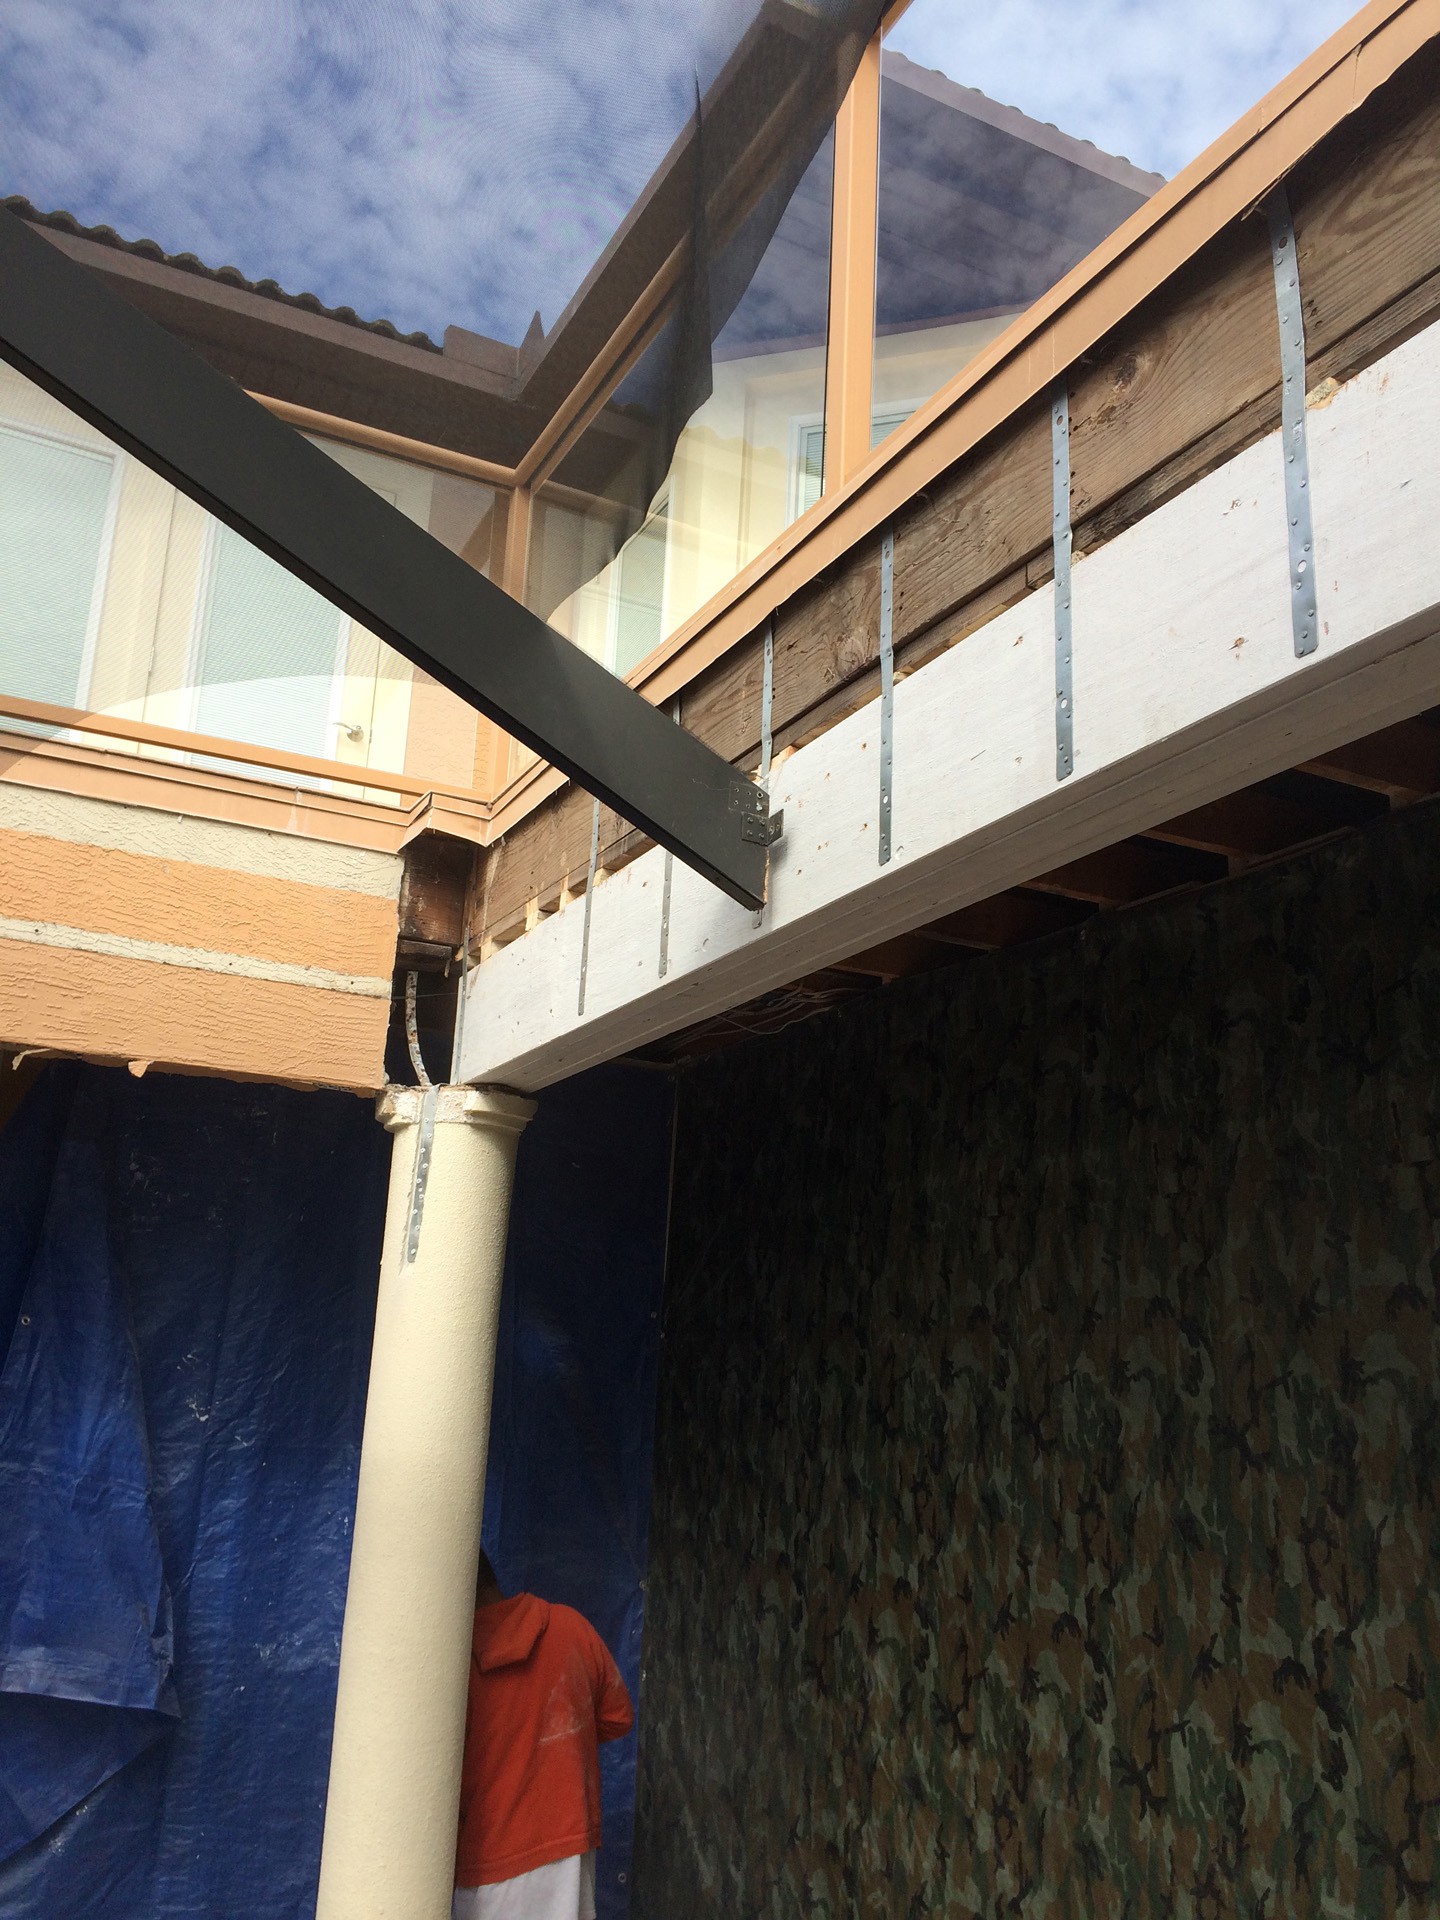
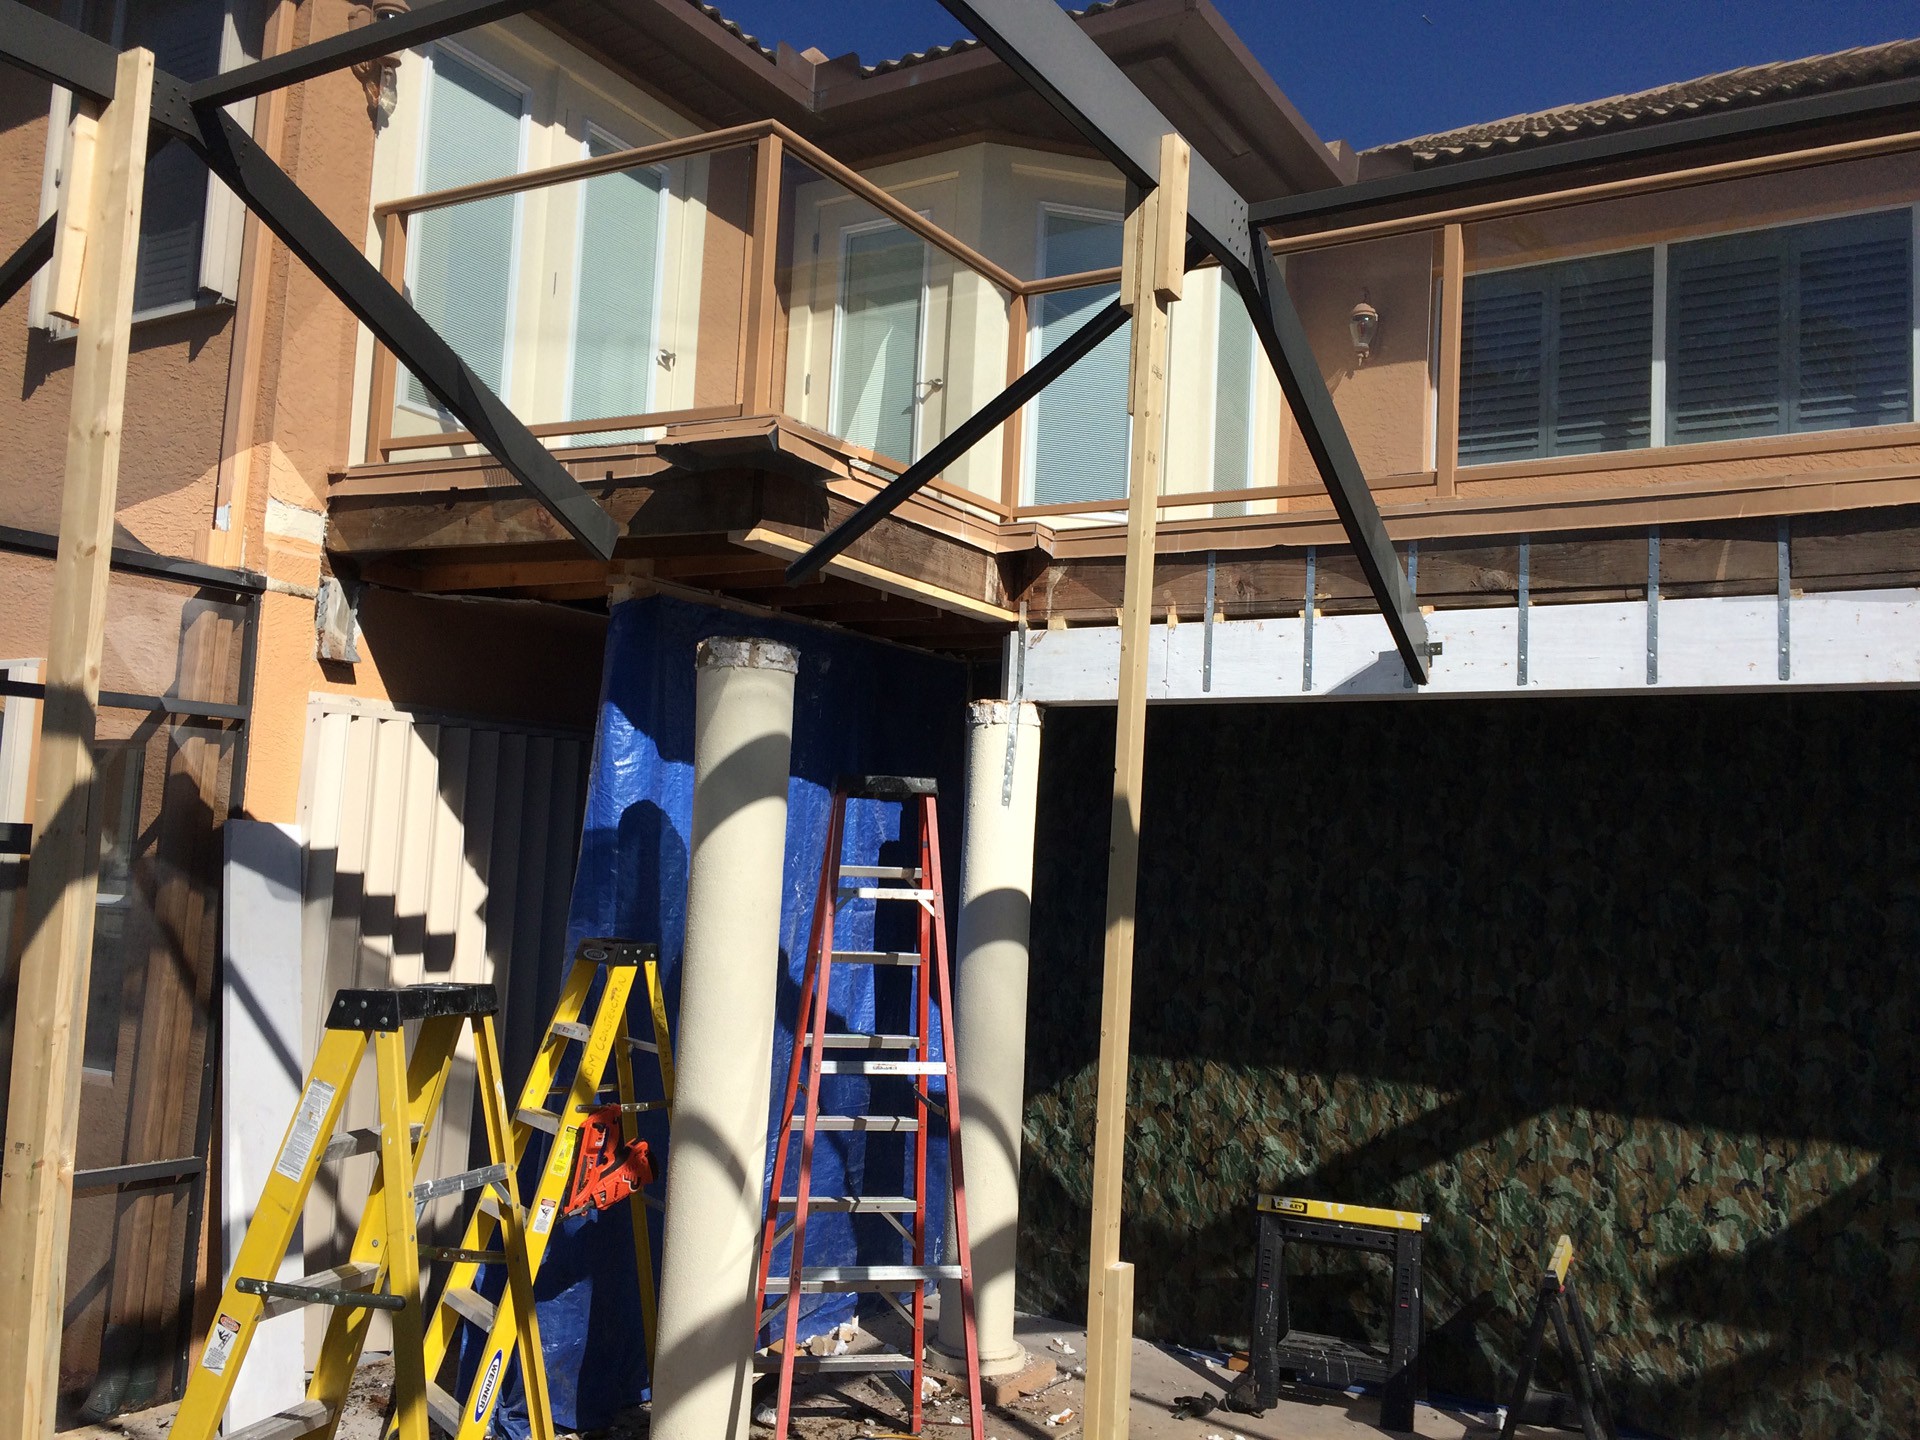
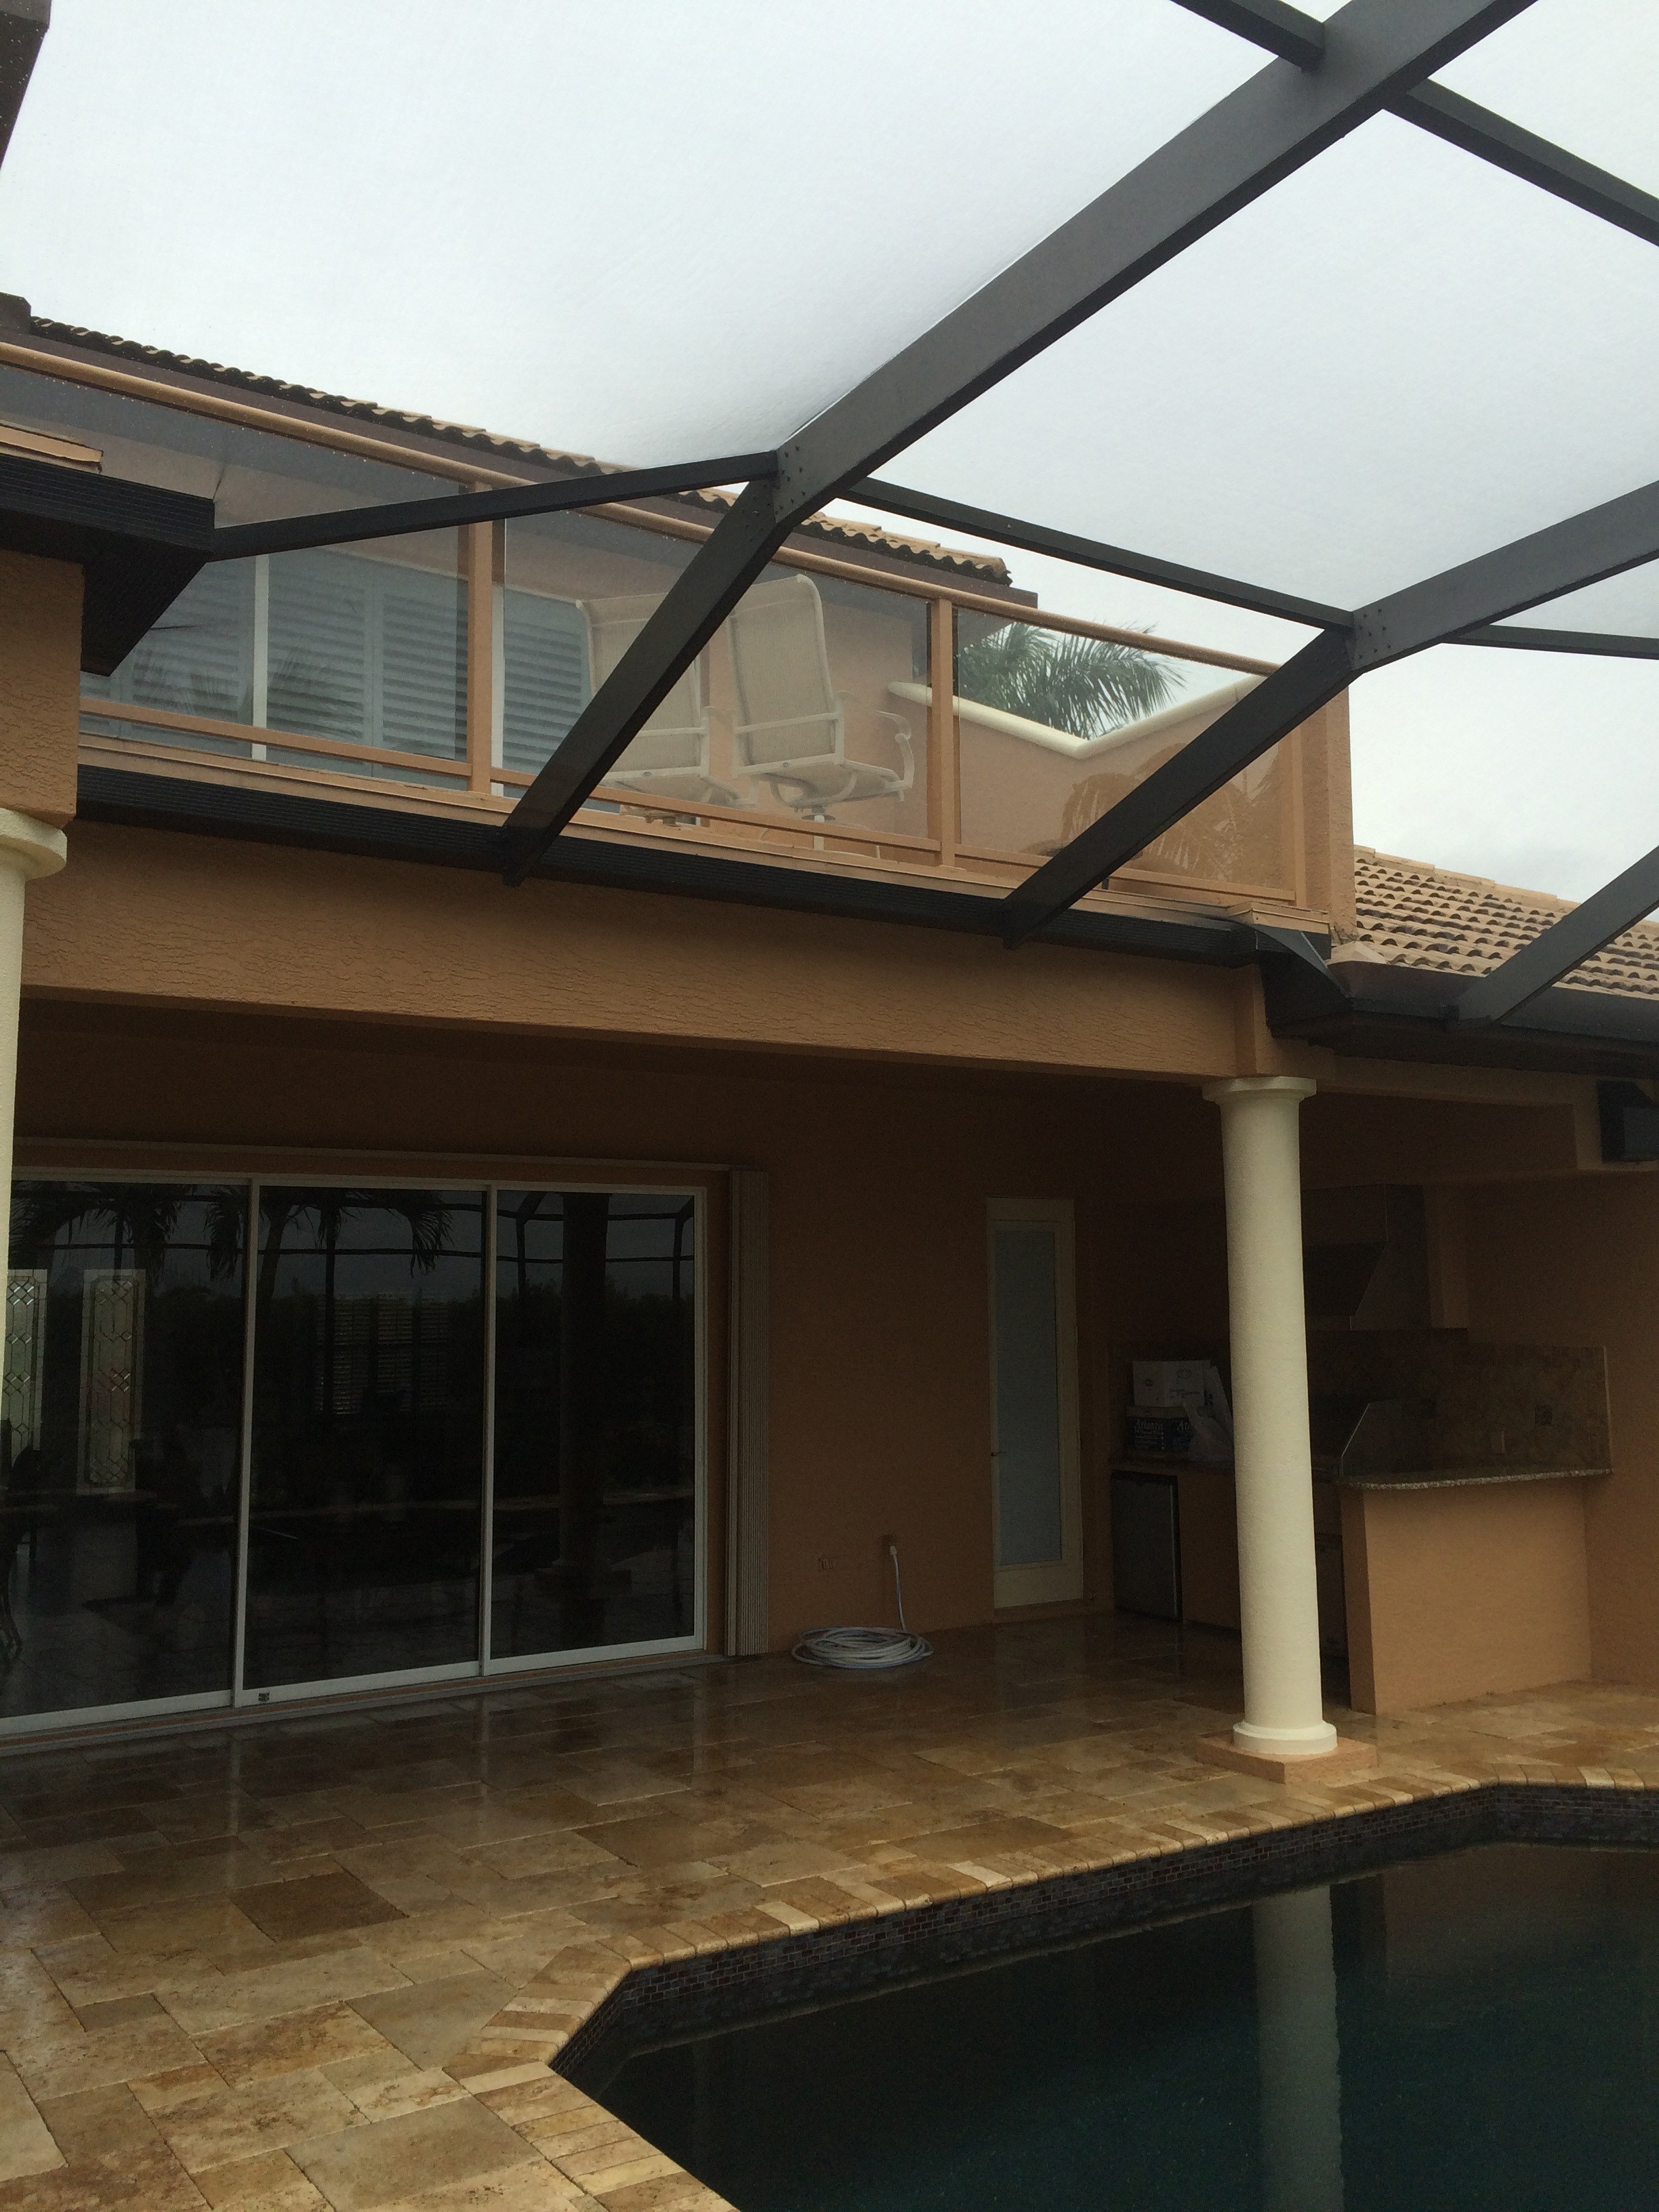
In November 2014, Patty asked if I could check on a slight crack in a beam below the balcony we had redone just over a year before. I gladly stopped in to see about her concern prior to them leaving for the holidays. The beam in question was under the screen cage, over 30″ below the balcony and spanned 18′ from one masonry column to another. To access the beam that we needed to inspect, we constructed scaffolding over their pool to reach the area in question and contain any debris. A beam of this length and size on the exterior of a home, which is set as part of masonry columns, would be constructed with concrete and rebar, like a tie beam of a house. With this in mind we contacted our local engineering firm about our concern with this crack and were advised to remove the stucco to see if the crack was a surface crack in the stucco or if it had expanded into the tie beam. To our shock, the beam was constructed with stucco and engineered lumber that was severely damaged in the middle of the span between the two masonry columns. We stopped immediately and constructed a support wall structure with southern yellow pine 2x6 lumber on opposite sides of the beam to hold up our client’s balcony. Upon removing more stucco, we discovered that the screen cage attachment bolts were connected directly to the engineered beams rather than to a gutter system. The screen cage aluminum frames had been channeling rain water directly into the mounting bolt holes which caused the structure around the bolts to rot. The issues with the screen cage were causing the entire lower 2/3rds of the beam to turn into mulch within the stucco, yet from the top, the beam looked completely intact.
The damage was not evident when the balcony was remodeled 14 months earlier as the top of the structure was encapsulated by sound, intact stucco - even when the lower section of stucco was removed - the top 3″-4″ of the beam were perfect and the lower 14″-15″ had turned to mulch. This damage did not happen over weeks or months, this damage started the day after the cage was replaced after hurricane Charlie in 2005, due to poor planning and poor construction practices.
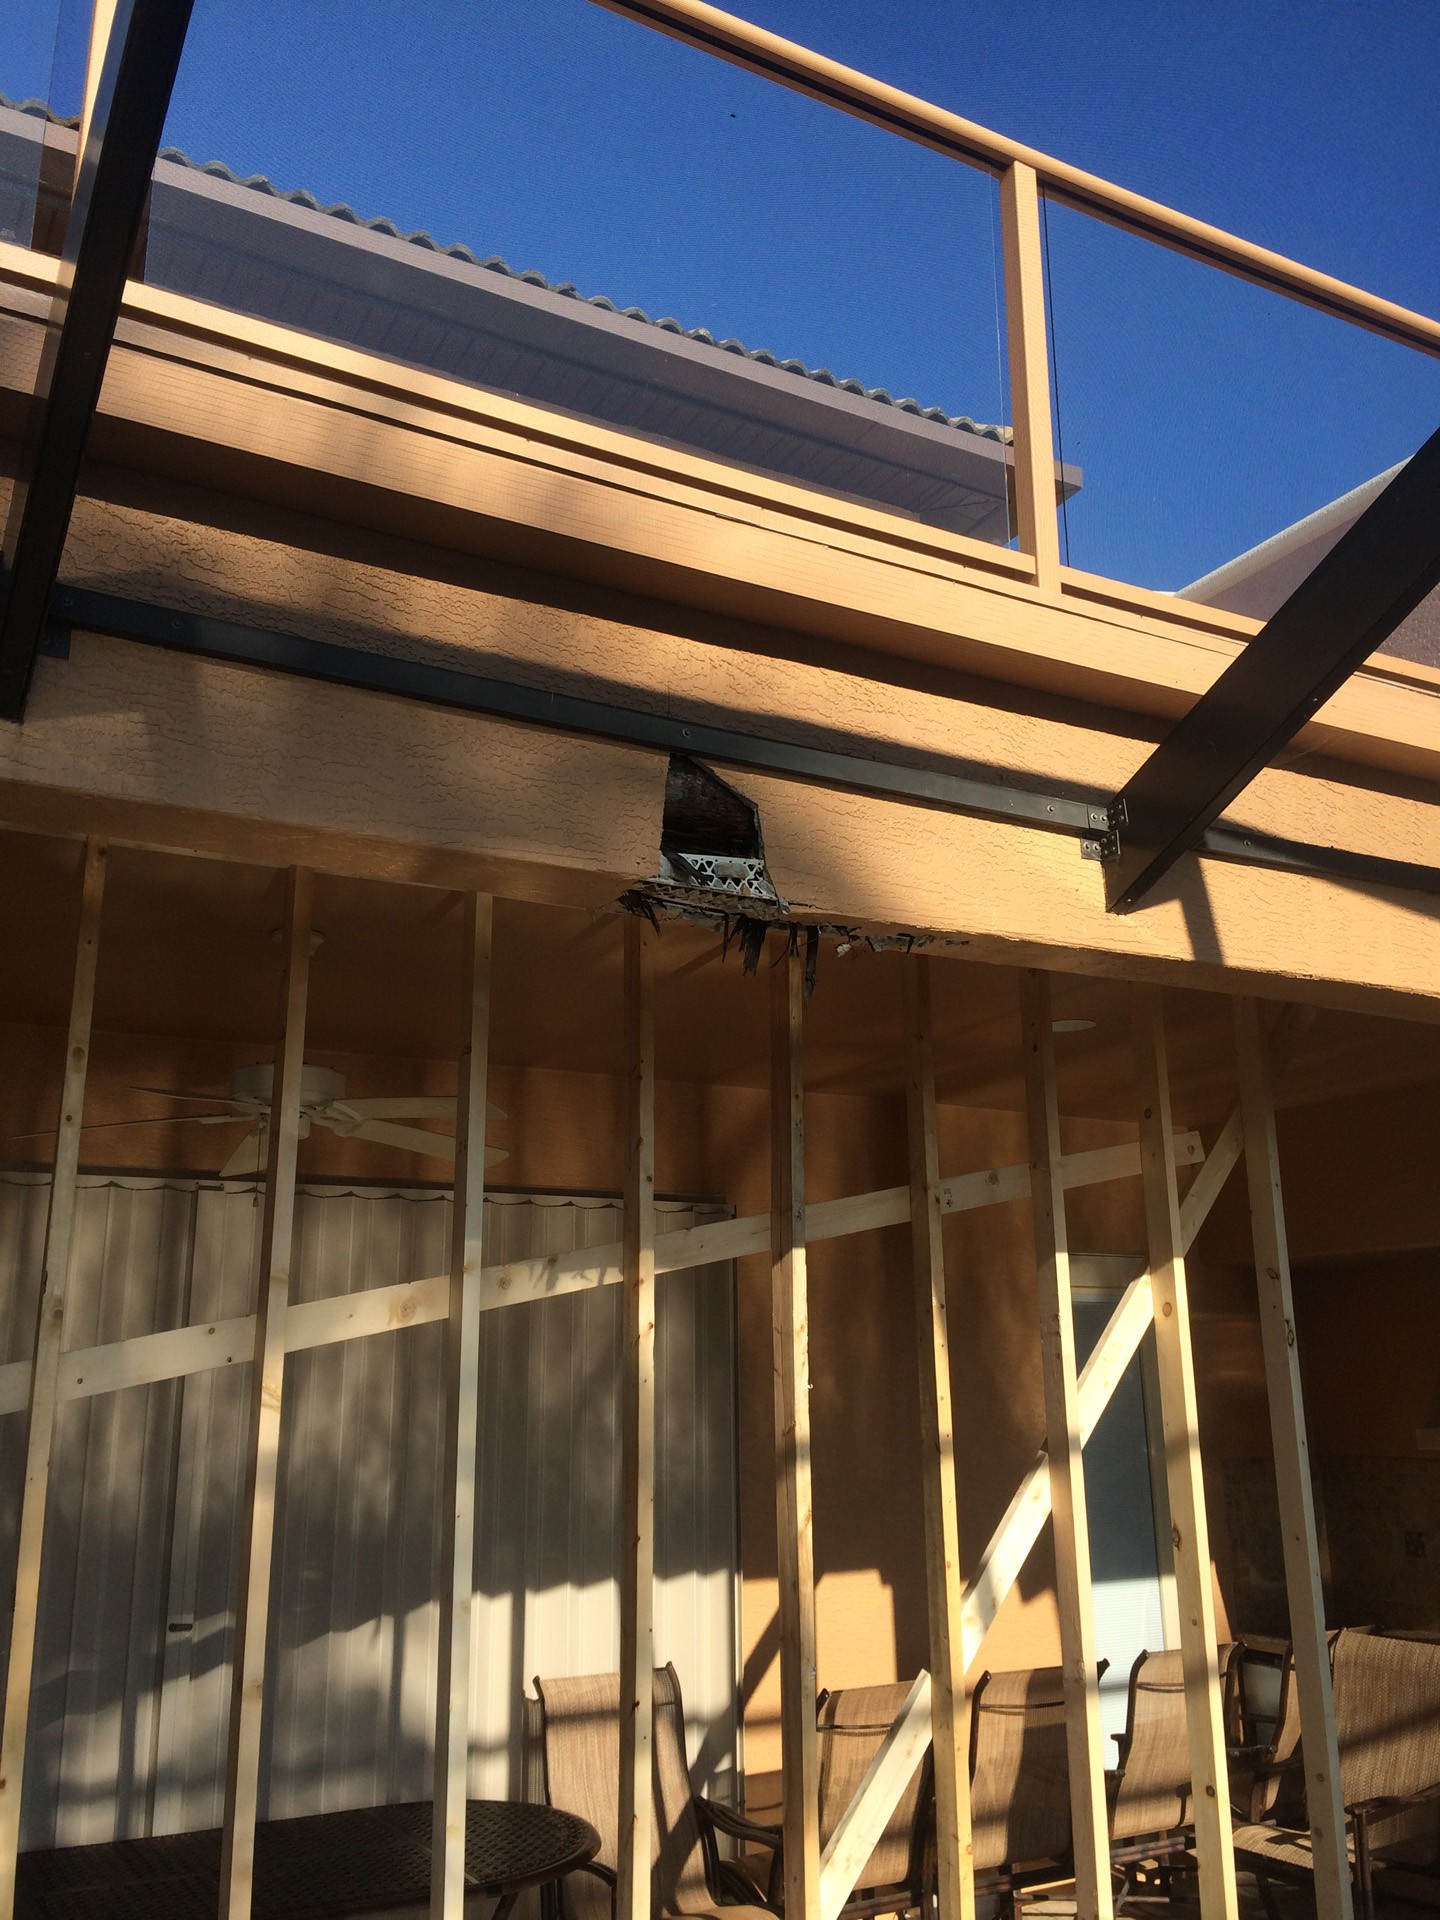
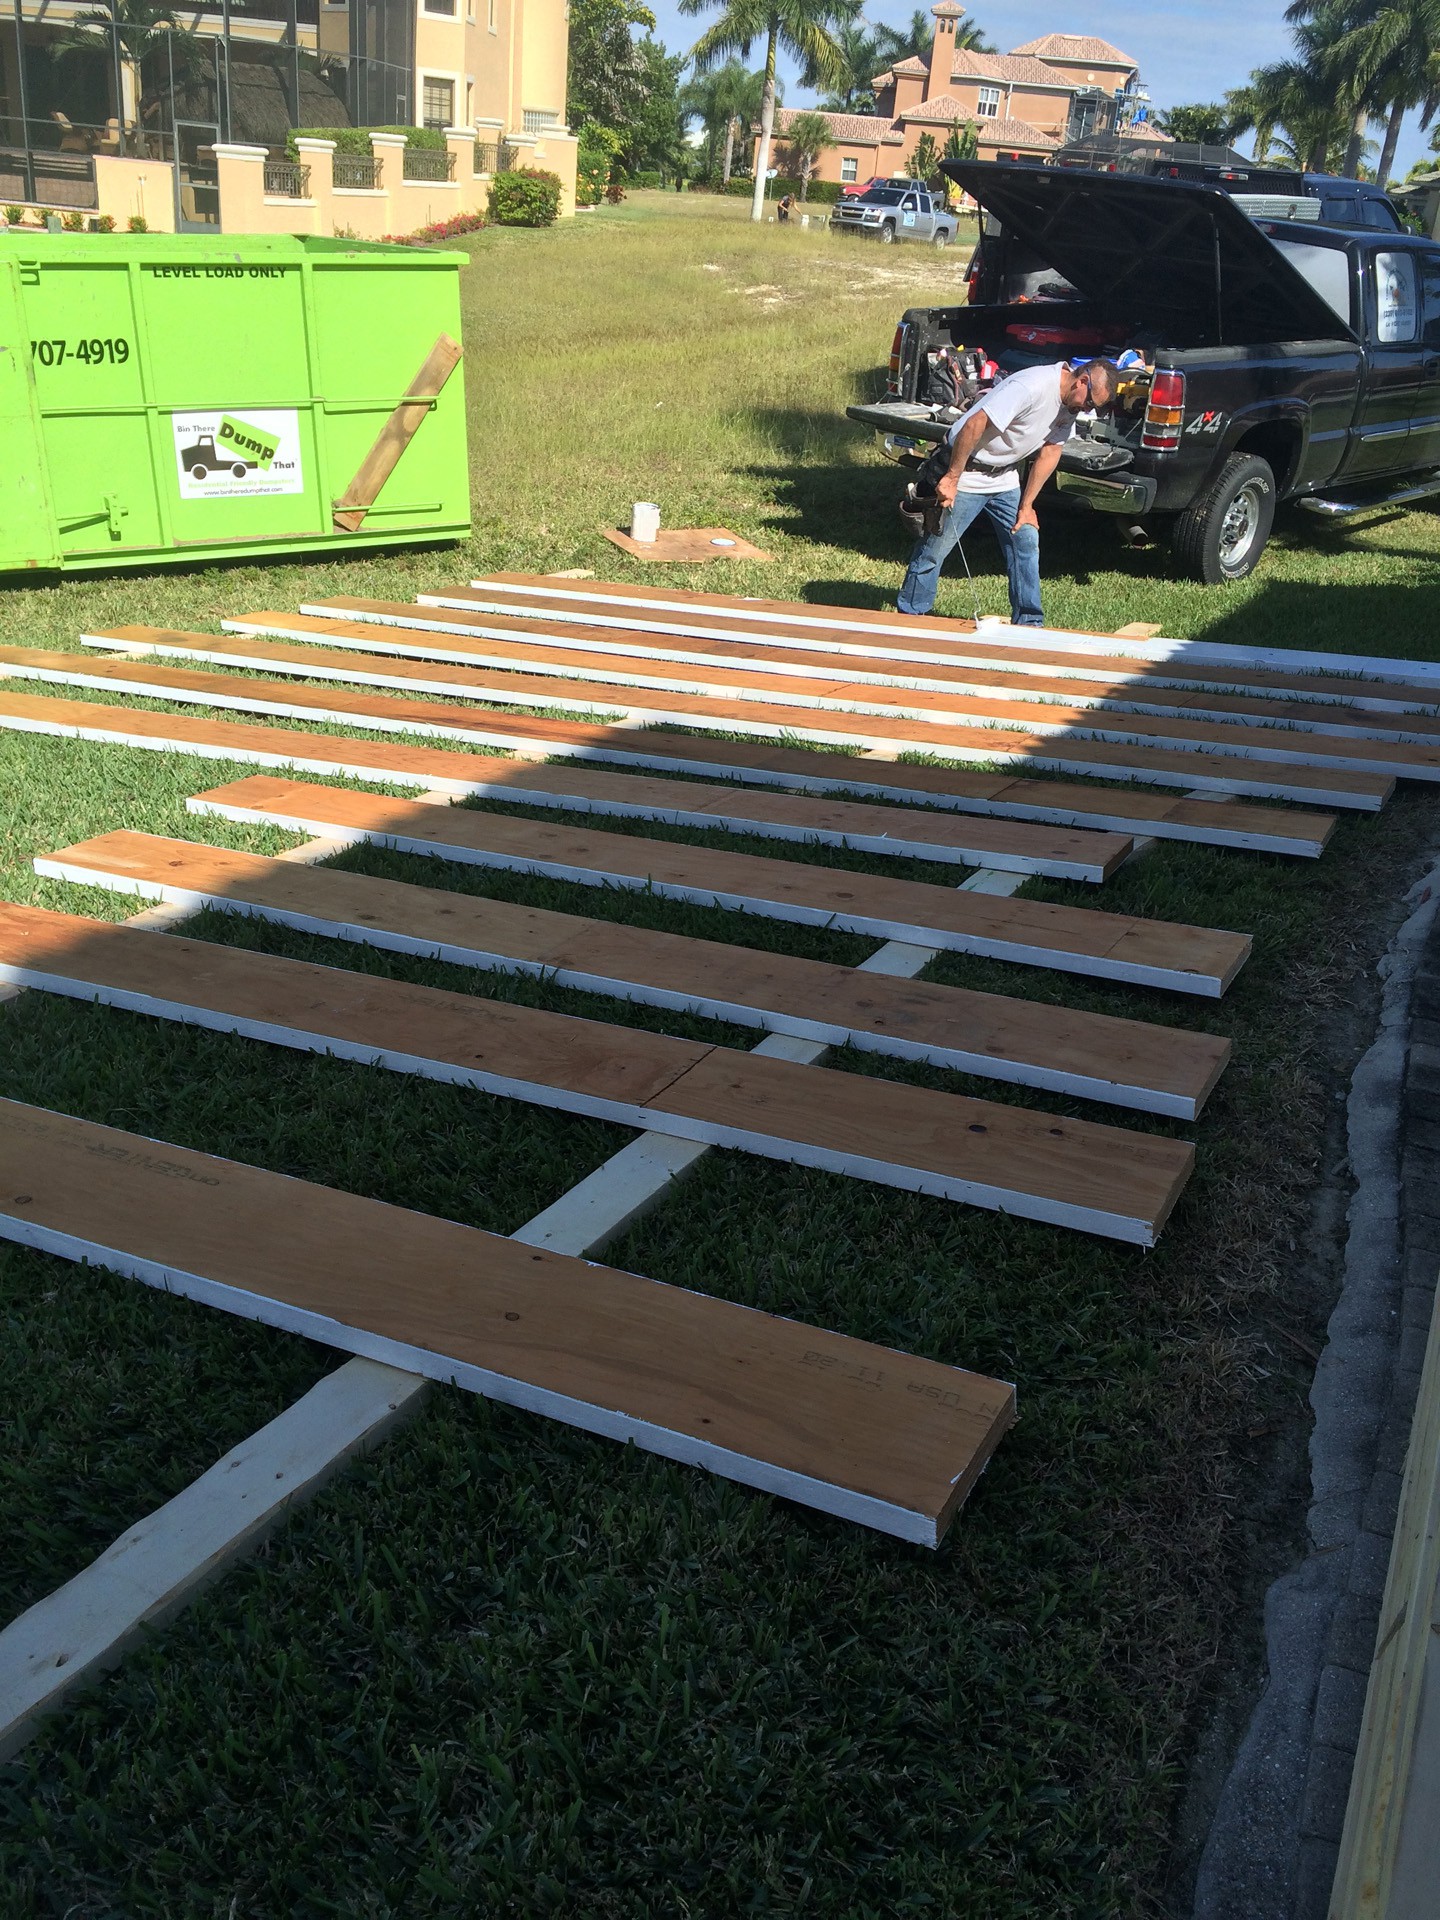
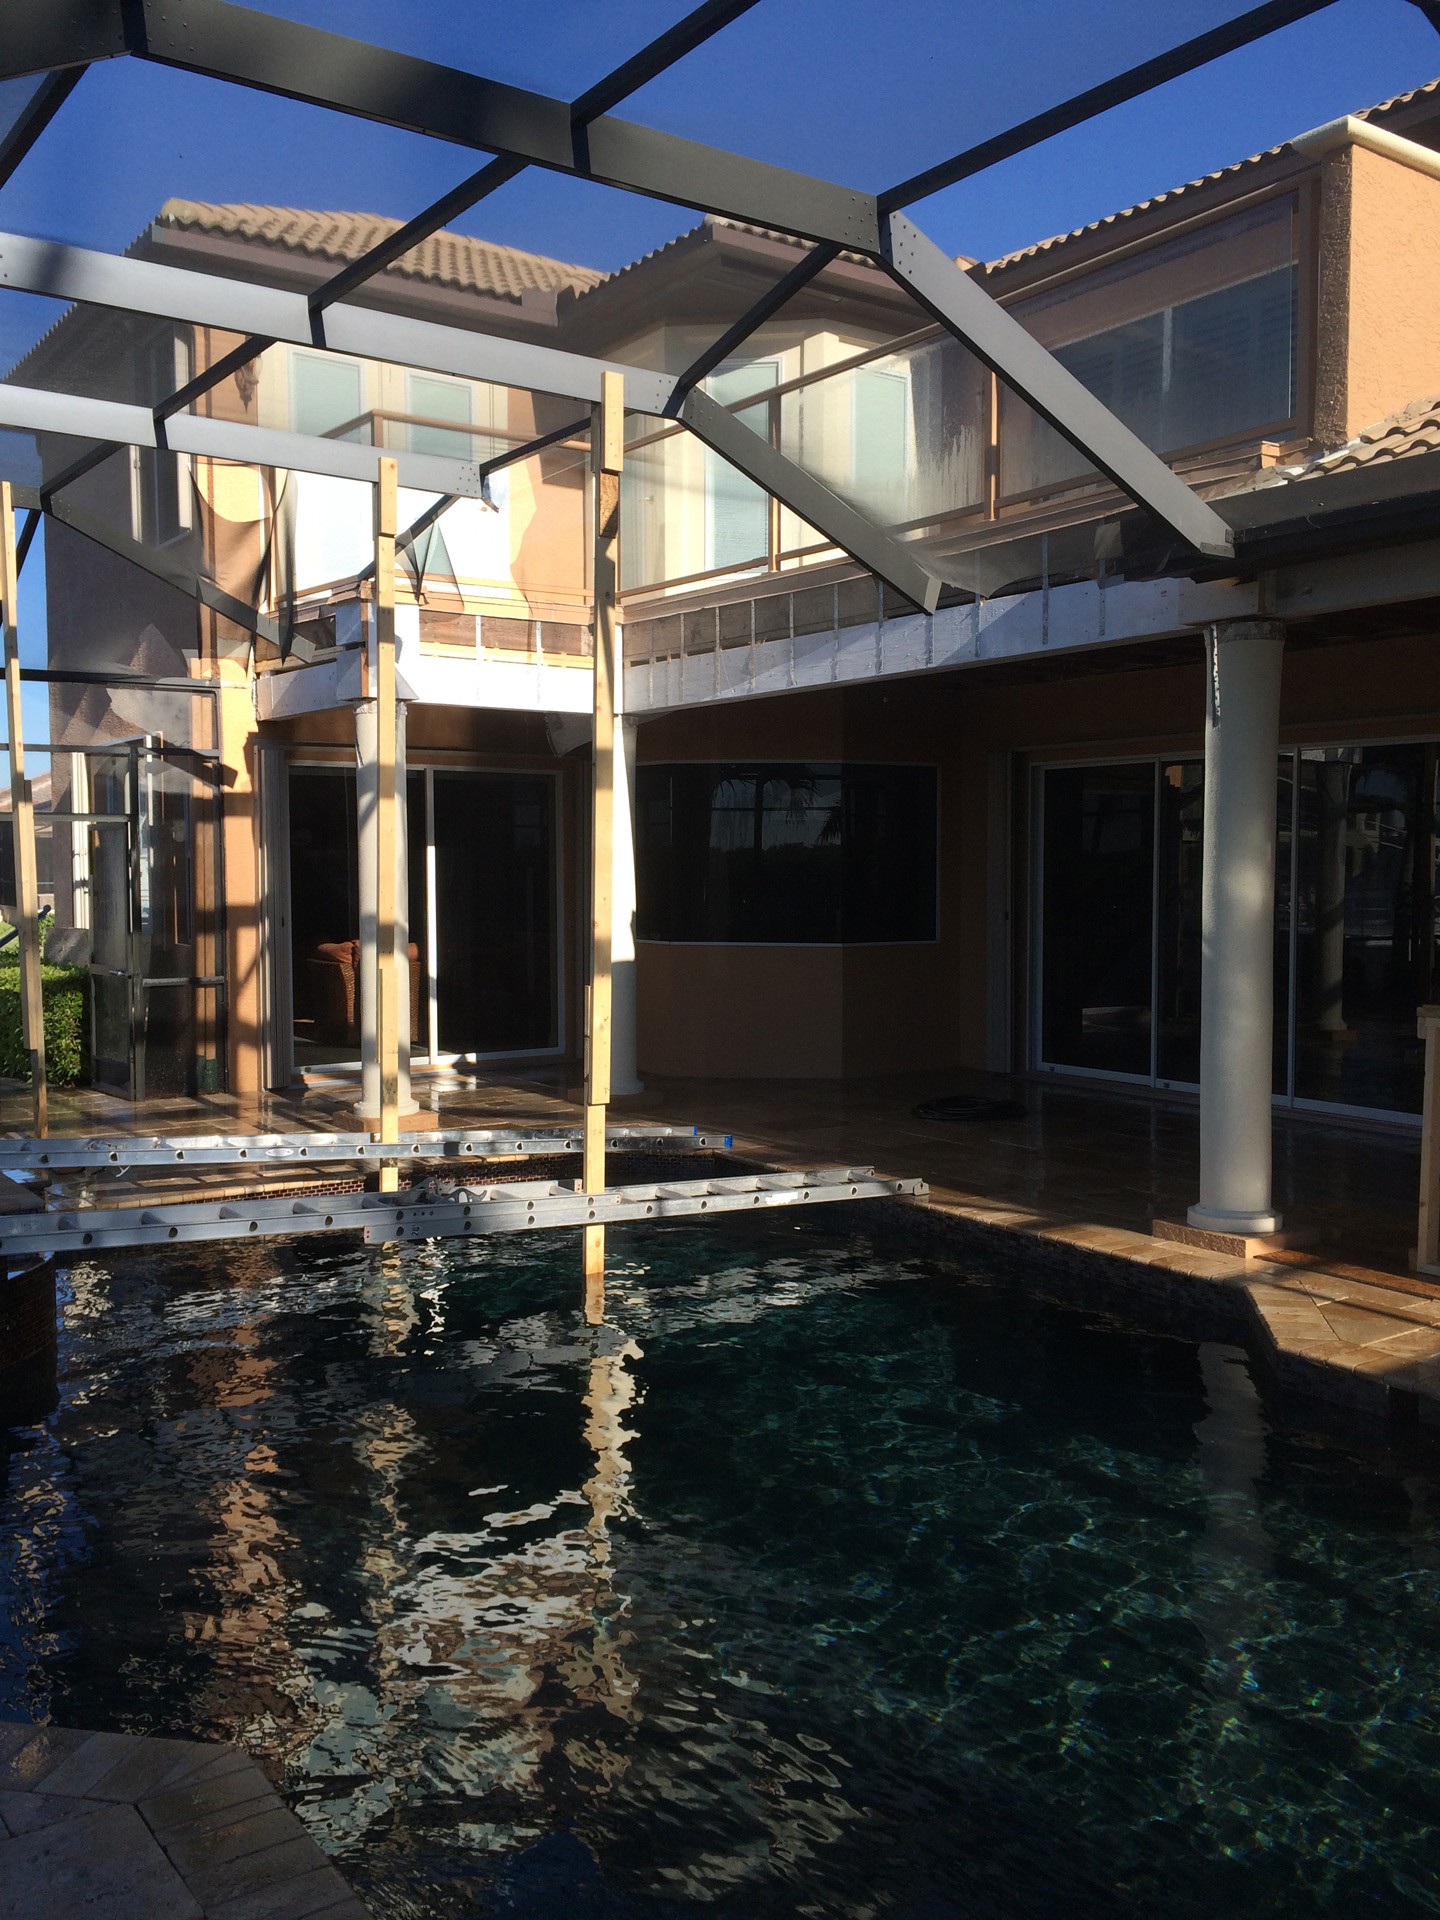
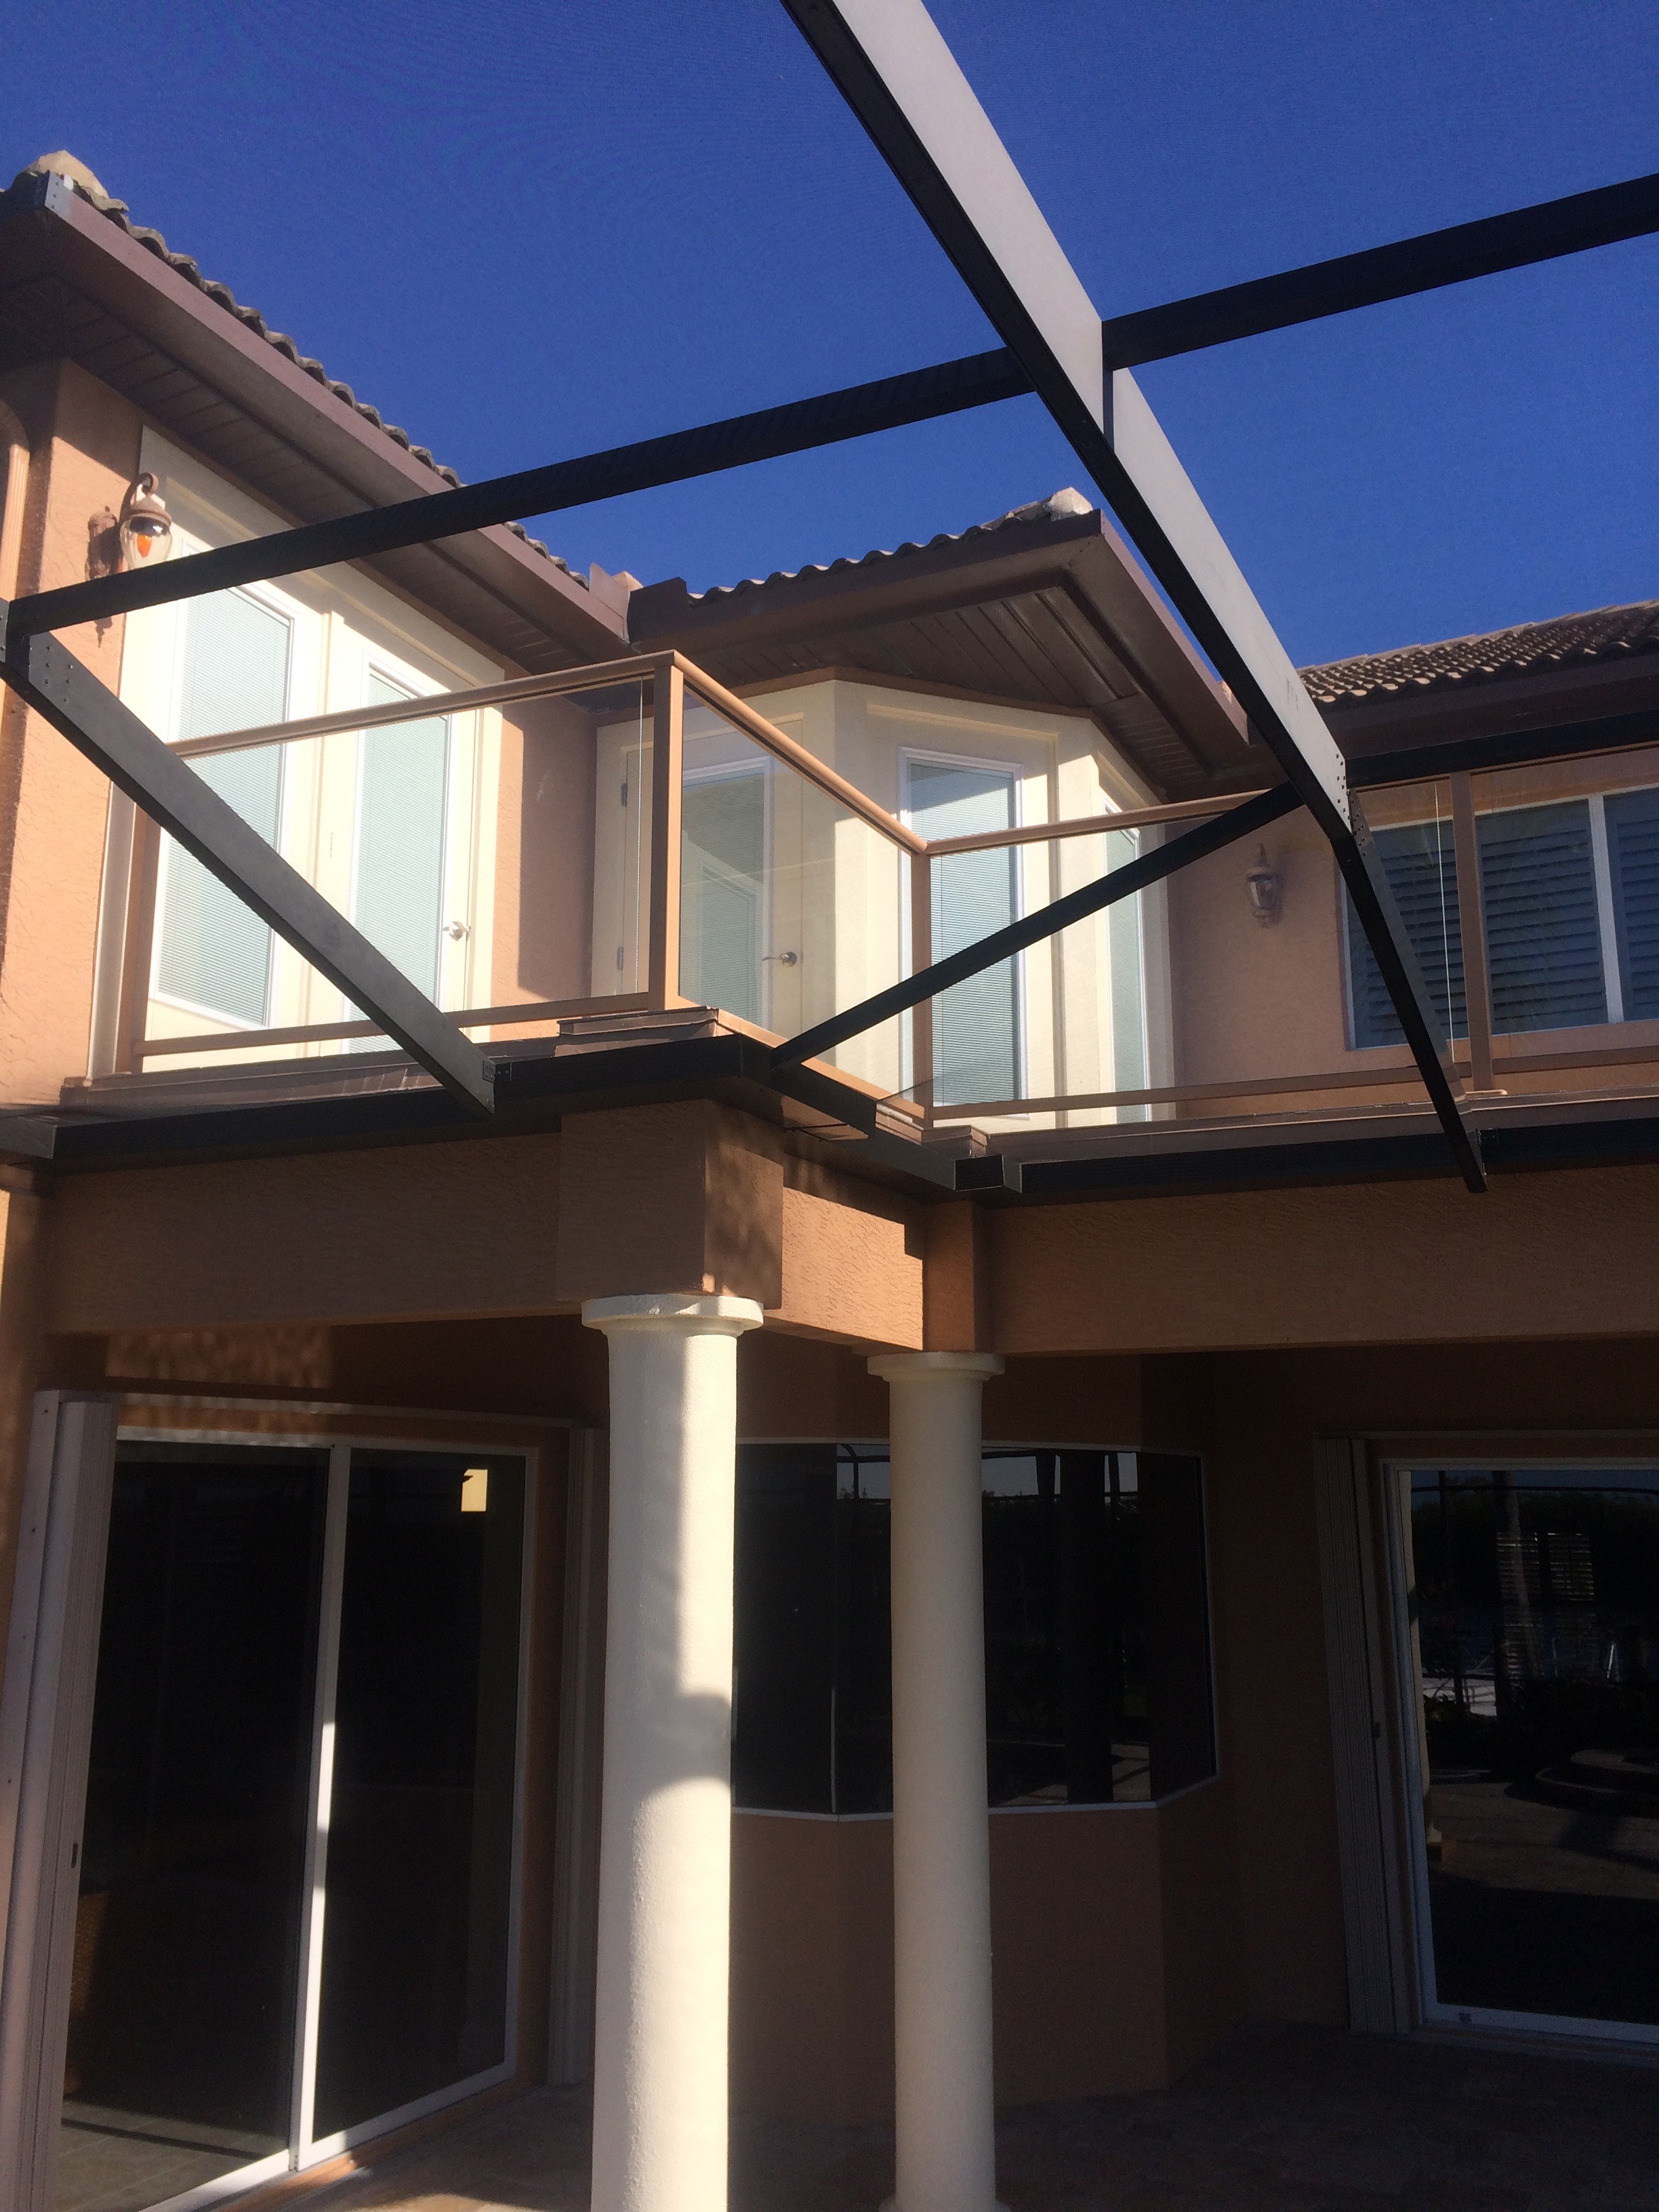
To make the necessary repairs, we secured the entire structure, supported the screen cage with support columns, cut the aluminum cage members away from the beam and began reconstruction. We replaced all the beams with three layers of new 1¾″ thick by 18″ tall LVL (Laminated Veneer Lumber) that we pre-sealed on all edges with an exterior oil-based primer. The individual beams were glued with PL Premium adhesive and screwed together with 3 ¾″x ¼″ galvanized screws and reattached to the floor system and columns with Simpson Z-Max galvanized hurricane strapping hardware. We completed the build-back with all necessary framing and hardware to exceed current building codes, applied necessary galvanized wire lathe and PVC stucco stop and corner trim and applied a two coat stucco finish and blended the repaired area into the adjacent texture to ensure that the repair was not evident. The stucco was sealed with Loxon exterior primer and the finish was a color-matched Super Paint from Sherwin Williams applied by our partners from All Pro Painters. We reconfigured the bronze aluminum screen cage by raising the angle of attachment to include a 7″ super gutter mounted under the drip edge of the balcony supporting the screen cage without penetrating the stucco or the framing within the structure and rescreened using ‘no-see-um PVC super screen’.
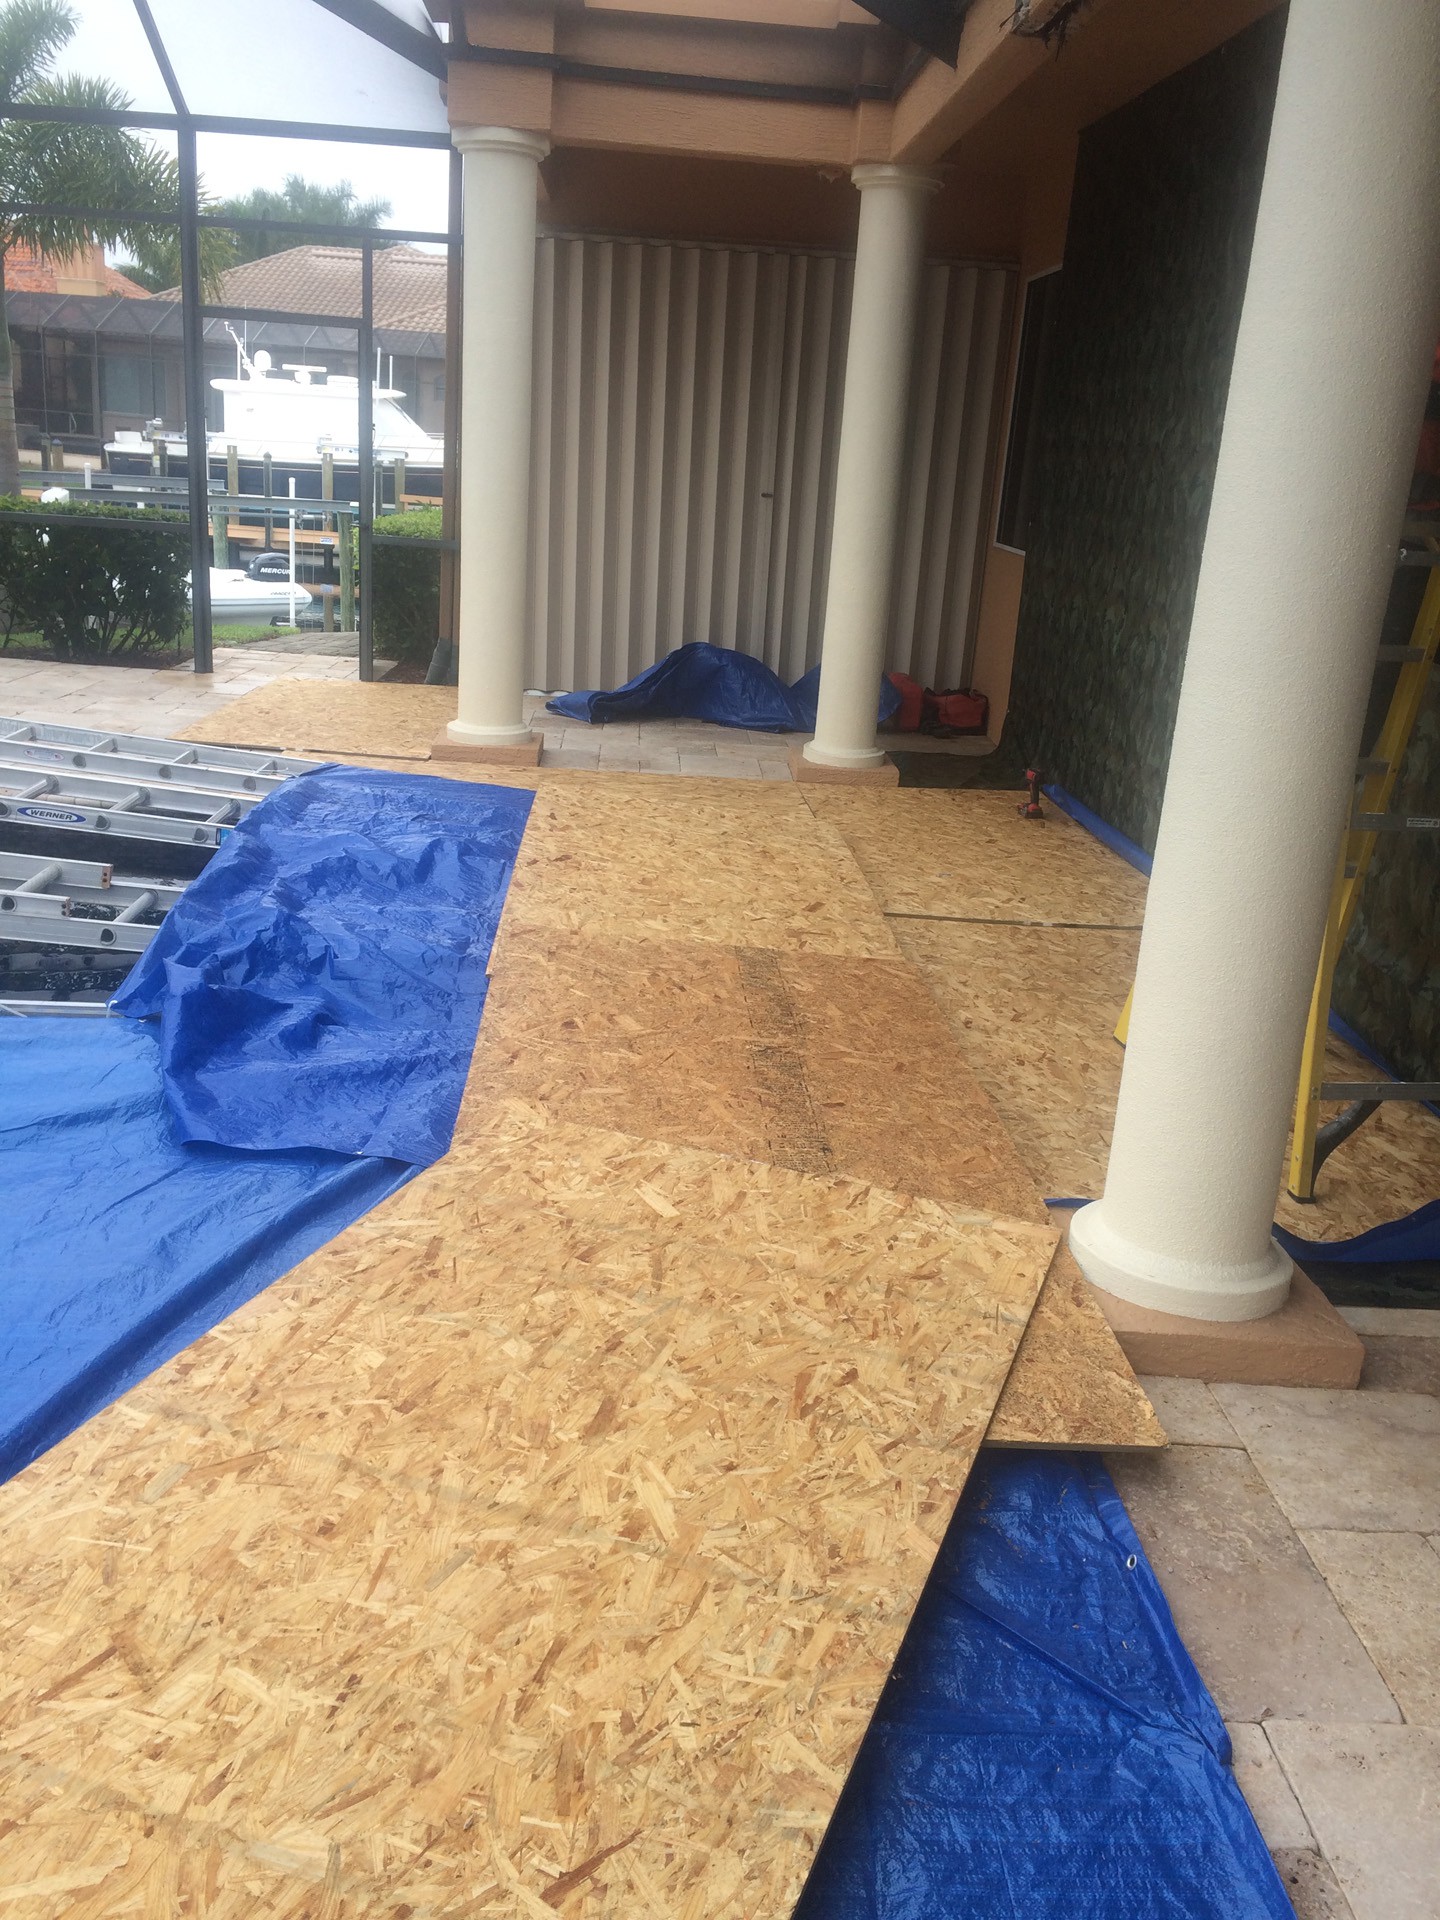
At WDM Consruction, we pride ourselves with not only going above and beyond with our preparation (seeking engineer and architectural advise), planning (pool and paver protection, staging to gain access, support and security for the property) and completion of a project of this kind (utilizing the best products and building practices available to date), but also on the fact that we would not turn the lanai and pool area back to the homeowner before pressure washing the paver deck and coping and then having our professional pool service clean and stabilize the pool chemicals and returning this home to the private vacation oasis that our clients originally purchased.
This damaged structure could have easily turned into a terribly tragic news story… if 15-20 holiday guests were out enjoying an evening view and the balcony gave way.… all because of ROT. Please call WDM Consruction if you have any concerns about ROT on your property. We will treat your project with respect and professionalism and make your home safe for your family and friends to enjoy without worry!